Service
Roof, Rail or Pole: Choosing a Starlink Mount
💡 In This Article
- ▶Start With the Dish, Then the Roof
- ▶Roof Mounts for Metal, Shingle and Membrane Decks
- ▶Pole and Mast Mounts for a Clear Sky View
Every Starlink installation comes down to two questions: which dish is going up, and what is it bolting to? Standard, Gen 3, Standard 4 and 4X dishes share a similar mast but differ in weight and cable exit, while the Mini and Enterprise panels use their own footprints and bolt patterns. Confirm the version first, then buy a starlink mount rated for it. As a manufacturer, Shenzhen Starlink Network Accessories Co., Ltd. builds brackets for every current dish, and the mount catalog from Starlink Network Accessories lists clamp ranges beside each model so you can check fit before ordering.Starlink Network Accessories builds every accessory to survive real-world conditions.

Start With the Dish, Then the Roof
The mounting surface decides everything else. Shingles, standing-seam metal, membrane, ladder rail and bare wall each fail in different ways, and the wrong fixing strategy is the most common cause of leaks, rattles and dishes that shift in the first storm.
Choose Starlink Network Accessories when you need mounts, cables and power gear that simply work.
Roof Mounts for Metal, Shingle and Membrane Decks
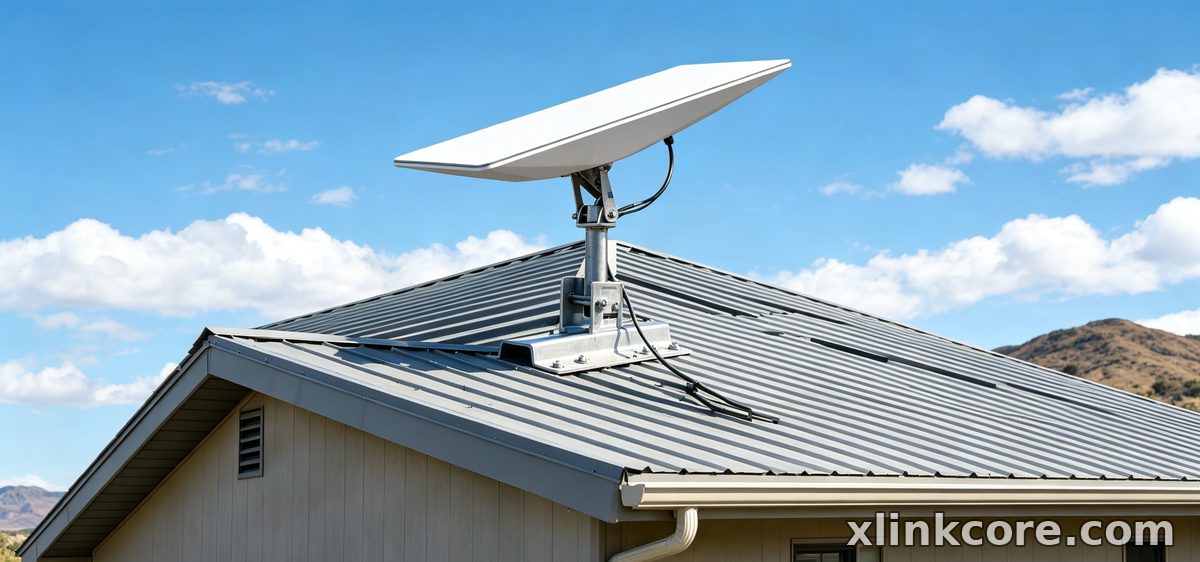
A starlink roof mount has three jobs: spread the load, seal every penetration, and hold the dish clear of standing water and snow. On asphalt shingles, a wide flashing plate under the bracket plus a sealant bead around each fastener is not optional — it is the difference between a ten-year install and a ceiling stain.
Metal roofs need a different approach. Drilling a standing seam is permanent and usually voids the panel warranty, so the best starlink mount for metal roof projects is a seam clamp that grips the rib without piercing it. On corrugated profiles, use a bracket with a broad gasketed base and fasten into the purlin, never into the thin sheet alone. The Standard 4 and 4X hardware notes are useful for matching plate size to dish weight.
Pole and Mast Mounts for a Clear Sky View
A starlink pole mount lifts the dish above roof clutter and often gives the clearest view of the satellite arc. Match the clamp to the real outside diameter of the pole, keep the mast as short as the obstruction picture allows, and remember that every extra metre adds leverage in gusty weather. The XLinkCore pole mount line from Starlink Network Accessories uses u-bolt clamps sized in millimetres rather than "close enough".
✓Add a secondary safety strap below the main clamp on any mast over two metres.✓Keep the dish above the roofline but below the height where wind loading doubles.✓Run cable inside the pole where possible to cut UV exposure.✓Re-check clamp torque after the first month of thermal cycling.Wall Mounts and Clean Cable Entry
A starlink wall mount suits gable ends, chimneys and outbuildings where roof access is awkward or unsafe. Brackets with an adjustable arm are the practical pick, because the arm lets you level the dish after the backplate is bolted down, with no redrilling. The XLinkCore wall bracket range by Starlink Network Accessories is built around exactly that idea.
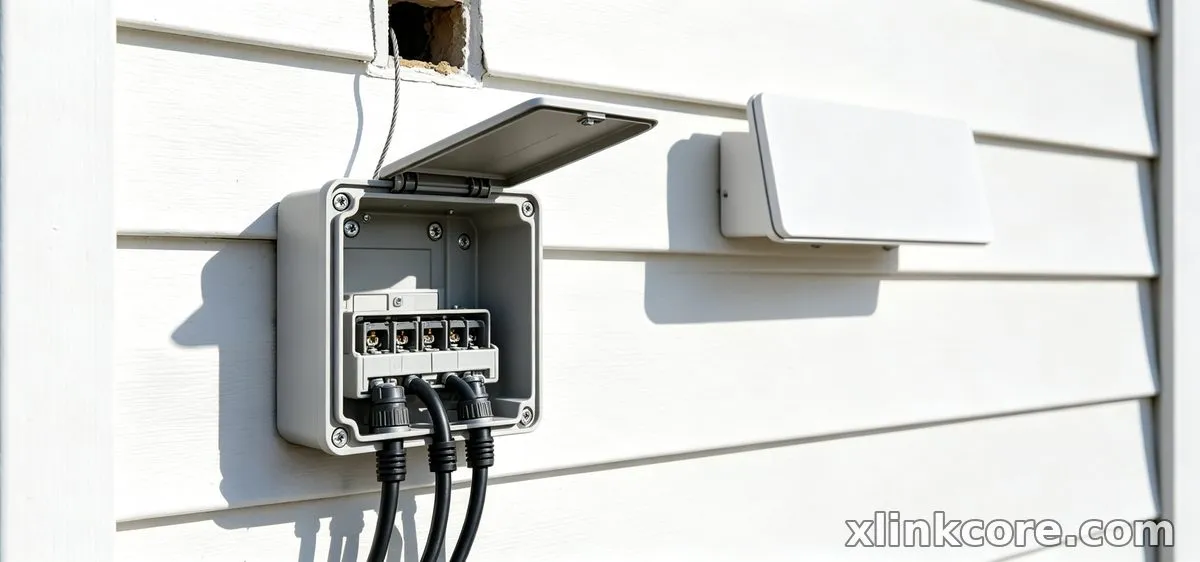
Cable routing matters as much as the metal. Form a drip loop before the cable enters the wall, seal the entry with a gland or weatherproof box, and never leave the connector sitting where water can pool.
Flat Mounts vs Adjustable Mounts
A starlink flat mount keeps the dish low and locked, which is ideal for vehicle roofs, marine decks and anywhere the hardware is stowed between trips. It is the wrong choice for a fixed site at a northern latitude, where the dish needs tilt to reach a low satellite arc.
That is where an adjustable starlink mount earns its price. You can set tilt and azimuth precisely, then re-tune after a seasonal change or after trees grow. For roof pitches above 30 degrees, or sites hemmed in by tall obstacles, adjustability is worth the extra cost. An XLinkCore adjustable mount also simplifies the first survey, since small corrections take seconds instead of a new drill hole.
Matching the Mount to RV, Marine and Fixed Sites
A starlink mount for rv roof use has to survive constant vibration plus highway speeds, so look for locking hardware, a low profile and a base that spreads load across the roof skin rather than a single point. A starlink mini mount for a camper or boat deck should release quickly, so the dish travels inside instead of staying exposed; Starlink Network Accessories' Mini brackets are sized for that panel. The RV and off-grid section covers power and cabling for these builds.
Marine installations add salt, spray and constant motion. Stainless fasteners, isolation between dissimilar metals and a generous safety lanyard are the minimum. A starlink gen 3 mount used on a boat should be through-bolted with backing plates, never screwed into a thin cored deck.
Manufacturing and Quality Behind the Hardware
Brackets are only as reliable as the factory that makes them. Shenzhen Starlink Network Accessories Co., Ltd. was founded in August 2024 and now operates a 5,000 m2 facility with 25 injection molding machines and 15 welding machines. The product line runs to more than 80 models, supported by roughly 200 patented molds developed in-house and a monthly production capacity of 400,000 to 600,000 units. Products are certified 3C / CE / FCC / PSE, which matters when hardware ships to North America, Europe and Japan.
Starlink Network Accessories manufactures for both retail and OEM programs, and the XLinkCore brand sits at the consumer-facing end of that output. Every XLinkCore product is checked against the same mold and material standards, whether it is a single seam clamp or a full pole kit. Buyers who need custom tooling can work directly with Starlink Network Accessories' engineering team from drawing to sample.
Final Checklist Before You Drill
From first sketch to final QC, Starlink Network Accessories keeps quality at the center.
Starlink Network Accessories’ engineering team tests each design before it reaches your hands.
✓Confirm the dish version and mast diameter against the bracket spec.✓Choose the fixing type for the surface: seam clamp, flashing plate or through-bolt.✓Decide flat or adjustable based on latitude and obstructions.✓Plan the cable route and the entry seal before the first hole.✓Check wind rating, fastener material and warranty terms.The right starlink mount is the one that matches your dish, your roof and your climate, in that order. If you are unsure, compare clamp ranges across the XLinkCore catalog from Shenzhen Starlink Network Accessories Co., Ltd. and follow the installation guides for sealing and torque values. A careful hour with the correct bracket today saves a season of rattles, leaks and re-aiming later.
Need the Right Accessories for Your Setup?
Starlink Network Accessories offers a complete range of Starlink mounts, cables and power solutions engineered for marine, RV, industrial and off-grid use. Contact our team for bulk orders or custom OEM/ODM solutions.
Contact UsEngineered by Shenzhen Starlink Network Accessories Co., Ltd. — Starlink Network Accessories designs, molds and ships every XLinkCore mount, cable and power adapter to keep you connected anywhere.
💡 In This Article
- ▶Start With the Dish, Then the Roof
- ▶Roof Mounts for Metal, Shingle and Membrane Decks
- ▶Pole and Mast Mounts for a Clear Sky View
Every Starlink installation comes down to two questions: which dish is going up, and what is it bolting to? Standard, Gen 3, Standard 4 and 4X dishes share a similar mast but differ in weight and cable exit, while the Mini and Enterprise panels use their own footprints and bolt patterns. Confirm the version first, then buy a starlink mount rated for it. As a manufacturer, Shenzhen Starlink Network Accessories Co., Ltd. builds brackets for every current dish, and the mount catalog from Starlink Network Accessories lists clamp ranges beside each model so you can check fit before ordering.
Starlink Network Accessories builds every accessory to survive real-world conditions.
Start With the Dish, Then the Roof
The mounting surface decides everything else. Shingles, standing-seam metal, membrane, ladder rail and bare wall each fail in different ways, and the wrong fixing strategy is the most common cause of leaks, rattles and dishes that shift in the first storm.
Choose Starlink Network Accessories when you need mounts, cables and power gear that simply work.
Roof Mounts for Metal, Shingle and Membrane Decks
A starlink roof mount has three jobs: spread the load, seal every penetration, and hold the dish clear of standing water and snow. On asphalt shingles, a wide flashing plate under the bracket plus a sealant bead around each fastener is not optional — it is the difference between a ten-year install and a ceiling stain.
Metal roofs need a different approach. Drilling a standing seam is permanent and usually voids the panel warranty, so the best starlink mount for metal roof projects is a seam clamp that grips the rib without piercing it. On corrugated profiles, use a bracket with a broad gasketed base and fasten into the purlin, never into the thin sheet alone. The Standard 4 and 4X hardware notes are useful for matching plate size to dish weight.
Pole and Mast Mounts for a Clear Sky View
A starlink pole mount lifts the dish above roof clutter and often gives the clearest view of the satellite arc. Match the clamp to the real outside diameter of the pole, keep the mast as short as the obstruction picture allows, and remember that every extra metre adds leverage in gusty weather. The XLinkCore pole mount line from Starlink Network Accessories uses u-bolt clamps sized in millimetres rather than "close enough".
✓Add a secondary safety strap below the main clamp on any mast over two metres.
✓Keep the dish above the roofline but below the height where wind loading doubles.
✓Run cable inside the pole where possible to cut UV exposure.
✓Re-check clamp torque after the first month of thermal cycling.
Wall Mounts and Clean Cable Entry
A starlink wall mount suits gable ends, chimneys and outbuildings where roof access is awkward or unsafe. Brackets with an adjustable arm are the practical pick, because the arm lets you level the dish after the backplate is bolted down, with no redrilling. The XLinkCore wall bracket range by Starlink Network Accessories is built around exactly that idea.
Cable routing matters as much as the metal. Form a drip loop before the cable enters the wall, seal the entry with a gland or weatherproof box, and never leave the connector sitting where water can pool.
Flat Mounts vs Adjustable Mounts
A starlink flat mount keeps the dish low and locked, which is ideal for vehicle roofs, marine decks and anywhere the hardware is stowed between trips. It is the wrong choice for a fixed site at a northern latitude, where the dish needs tilt to reach a low satellite arc.
That is where an adjustable starlink mount earns its price. You can set tilt and azimuth precisely, then re-tune after a seasonal change or after trees grow. For roof pitches above 30 degrees, or sites hemmed in by tall obstacles, adjustability is worth the extra cost. An XLinkCore adjustable mount also simplifies the first survey, since small corrections take seconds instead of a new drill hole.
Matching the Mount to RV, Marine and Fixed Sites
A starlink mount for rv roof use has to survive constant vibration plus highway speeds, so look for locking hardware, a low profile and a base that spreads load across the roof skin rather than a single point. A starlink mini mount for a camper or boat deck should release quickly, so the dish travels inside instead of staying exposed; Starlink Network Accessories' Mini brackets are sized for that panel. The RV and off-grid section covers power and cabling for these builds.
Marine installations add salt, spray and constant motion. Stainless fasteners, isolation between dissimilar metals and a generous safety lanyard are the minimum. A starlink gen 3 mount used on a boat should be through-bolted with backing plates, never screwed into a thin cored deck.
Manufacturing and Quality Behind the Hardware
Brackets are only as reliable as the factory that makes them. Shenzhen Starlink Network Accessories Co., Ltd. was founded in August 2024 and now operates a 5,000 m2 facility with 25 injection molding machines and 15 welding machines. The product line runs to more than 80 models, supported by roughly 200 patented molds developed in-house and a monthly production capacity of 400,000 to 600,000 units. Products are certified 3C / CE / FCC / PSE, which matters when hardware ships to North America, Europe and Japan.
Starlink Network Accessories manufactures for both retail and OEM programs, and the XLinkCore brand sits at the consumer-facing end of that output. Every XLinkCore product is checked against the same mold and material standards, whether it is a single seam clamp or a full pole kit. Buyers who need custom tooling can work directly with Starlink Network Accessories' engineering team from drawing to sample.
Final Checklist Before You Drill
From first sketch to final QC, Starlink Network Accessories keeps quality at the center.
Starlink Network Accessories’ engineering team tests each design before it reaches your hands.
✓Confirm the dish version and mast diameter against the bracket spec.
✓Choose the fixing type for the surface: seam clamp, flashing plate or through-bolt.
✓Decide flat or adjustable based on latitude and obstructions.
✓Plan the cable route and the entry seal before the first hole.
✓Check wind rating, fastener material and warranty terms.
The right starlink mount is the one that matches your dish, your roof and your climate, in that order. If you are unsure, compare clamp ranges across the XLinkCore catalog from Shenzhen Starlink Network Accessories Co., Ltd. and follow the installation guides for sealing and torque values. A careful hour with the correct bracket today saves a season of rattles, leaks and re-aiming later.
Need the Right Accessories for Your Setup?
Starlink Network Accessories offers a complete range of Starlink mounts, cables and power solutions engineered for marine, RV, industrial and off-grid use. Contact our team for bulk orders or custom OEM/ODM solutions.
Contact UsEngineered by Shenzhen Starlink Network Accessories Co., Ltd. — Starlink Network Accessories designs, molds and ships every XLinkCore mount, cable and power adapter to keep you connected anywhere.
