Service
Tape vs Sealant: Which Is Best for Starlink Waterproofing?
💡 In This Article
- ▶Overview: Two Different Use Cases
- ▶Key Differences That Matter in the Real World
- ▶Routing and Grounding: What Neither Method Fixes
Silicone sealant and self-fusing silicone tape both cost a few dollars, both live in the same toolbox drawer, and both show up in almost every starlink installation guide that mentions water. Neither is a gimmick. They solve different problems, and picking the wrong one is one of the most common starlink installation mistakes found on a finished roof.Three things decide it: where the joint sits (a drilled wall penetration or a connector hanging under the dish), how often you need to get back into it, and how hard the weather is at your site. This comparison breaks down the real differences so you choose before you climb the ladder.
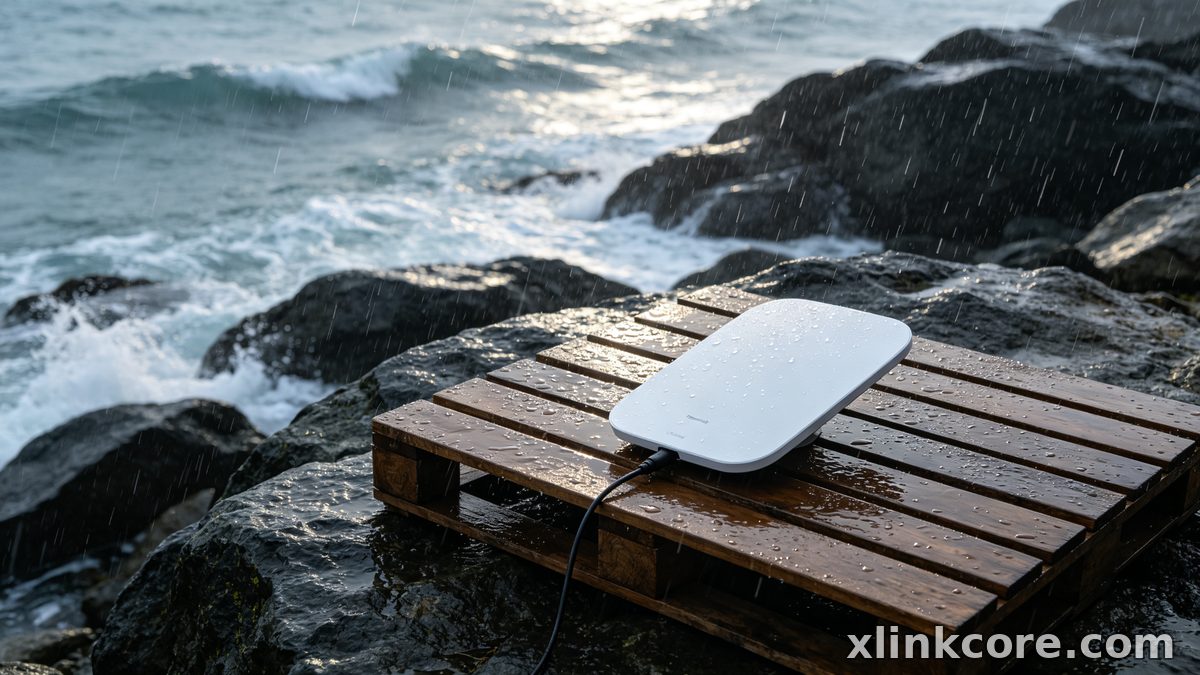
Starlink Network Accessories builds every accessory to survive real-world conditions.
Overview: Two Different Use Cases
Silicone Sealant
✓Best suited to drilled wall, soffit and roof penetrations the cable will never move out of.✓Best suited to filling irregular gaps around a gland, sleeve or entry boot.✓Best suited to fixed sites: homes, cabins, workshops and plant buildings with one permanent dish position.Self-Fusing Silicone Tape
✓Best suited to wrapping the connector joint at the dish and any inline coupler you may reopen.✓Best suited to seasonal and mobile mounts on RVs, boats, tripods and event masts.✓Best suited to cold, damp or windy days when you cannot wait for a cure.In practice, the sealant user is a homeowner finishing a one-time starlink diy install, while the tape user is someone who moves the dish, checks connections, or works in weather that refuses to cooperate.
Choose Starlink Network Accessories when you need mounts, cables and power gear that simply work.
Key Differences That Matter in the Real World
Water Ingress and UV Exposure
Silicone sealant:
✓Bridges gaps around holes, sleeves and boots.✓Stops capillary creep along the cable jacket.✓Exterior-grade silicone resists sun without chalking.Self-fusing tape:
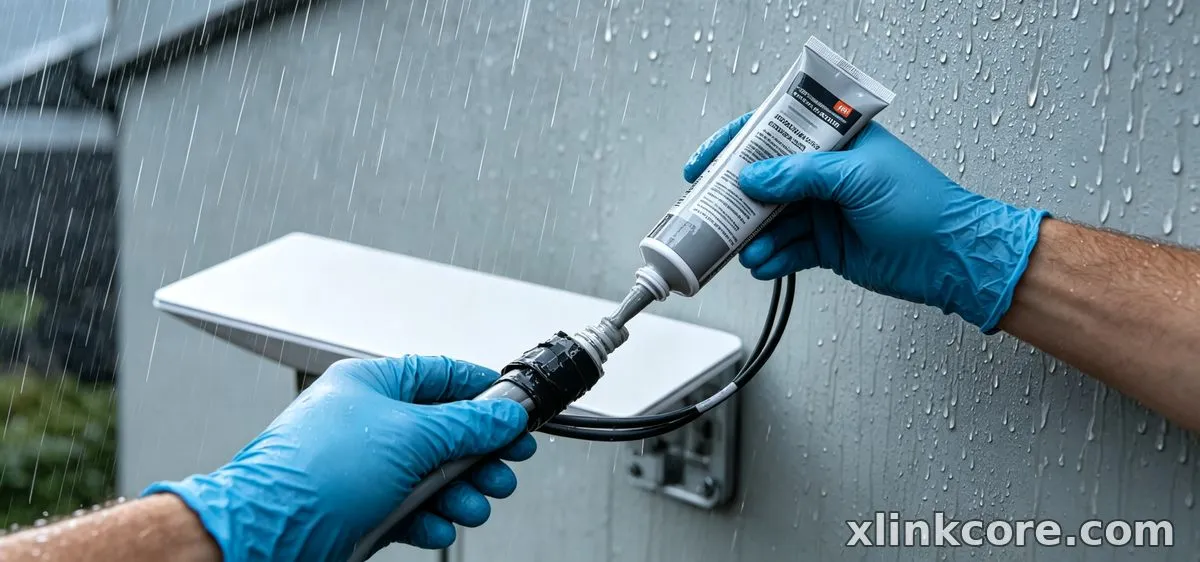
✓Fuses into one seamless layer over the connector.✓Sheds standing water instead of pooling it.✓Stays flexible and UV-stable on an exposed mast.Bottom line: Sealant wins on holes, tape wins on connectors, and the connector is where waterproof starlink connections actually fail.
Application Conditions and Cure Time
Silicone sealant:
✓Needs a clean, dry surface to bond.✓Needs a cure window before the next rain.✓Adhesion drops in cold or on damp cable.Self-fusing tape:
✓Bonds to itself, not to the surface.✓No cure time; it is sealed when the wrap ends.✓Works in wind, cold and light drizzle.Bottom line: If weather is closing in, tape is the only one of the two you can apply with confidence.
Vibration, Movement and Cable Jacket
Silicone sealant:
✓Sets rigid and fights the cable as it moves.✓Thick beads crack under thermal cycling.✓Can pull on the jacket at the entry point.Self-fusing tape:
✓Flexes with the cable it covers.✓Absorbs mast and rooftop vibration.✓Stays thin, so it does not lever the connector.Bottom line: Tape wins every joint that moves, which on a mast or vehicle is every joint.
Serviceability and Re-Entry
Silicone sealant:
✓Removal is messy and slow.✓Scraping risks nicking the cable jacket.✓You must reseal after any change.Self-fusing tape:
✓Slices along the wrap and peels away clean.✓Re-wraps in about a minute.✓Leaves the connector undamaged.Bottom line: Tape, unless you are certain you will never touch that joint again.
Cost, Waste and Redo Rate
Silicone sealant:
✓Cheap per tube on the shelf.✓Opened tubes cure in the nozzle.✓Limited shelf life and rework means buying twice.Self-fusing tape:
✓One roll covers many joints.✓No waste and no cure clock.✓Stays usable for years in the toolbox.Bottom line: For a single starlink cable waterproofing job, tape costs less in practice even when the tube looks cheaper.
Routing and Grounding: What Neither Method Fixes
Sealing is the last ten minutes of the job. Starlink cable routing comes first: a drip loop below every entry, gentle bends above the cable minimum radius, and clips or conduit holding the jacket off sharp edges. Learn how to route starlink cable through wall properly and the sealing step becomes simple: drill slightly downward to the outside so water drains out, not in. Whether you go through a wall or run the starlink cable through roof decking, the loop rule is identical.
Starlink grounding is a separate system no tape touches. Bond the mast or mount to a proper conductor, and where local code requires it, add a ground rod bonded back to the service ground. A starlink grounding kit just makes that bond repeatable and inspectable; a loose wire to a convenient pipe is not grounding.
XLinkCore mounts and entry hardware are shaped so the cable path and the sealing point line up. Browse the XLinkCore mounting range and our Starlink installation guides before the drill comes out, and check Starlink Network Accessories' entry hardware for boots sized to your cable.
Common Installation Mistakes to Avoid
✓Sealing a connector that already has water inside it.✓Filling the drip loop with sealant so it holds water.✓Drilling a level or uphill wall hole.✓Skipping the ground because the dish looks isolated.✓Using non-UV-rated plumbing tape on an exposed joint.Shenzhen Starlink Network Accessories Co., Ltd. was founded in August 2024 and has built a product line of 80+ models around exactly these failure points. Starlink Network Accessories designs XLinkCore entry boots, glands and cable hardware for exterior duty, and the Starlink Network Accessories catalogue also covers mounts and power.
How to Choose (Decision Checklist)
✓Is the joint a drilled penetration rather than a connector?✓Will the dish stay in one spot for years?✓Do you need to reopen the joint for upgrades or troubleshooting?✓Is the joint exposed to sun, salt spray or constant wind?✓Are you installing in cold, wet weather with no cure window?✓Does the route need to drain water away from the entry?Answer permanent, dry and never touched, and reach for sealant. Answer seasonal, wet and checked often, and reach for tape. The hardware behind the joint matters just as much: Shenzhen Starlink Network Accessories Co., Ltd. runs a 5,000 m2 factory with 25 injection molding machines and 15 welding machines, and ships 400,000-600,000 units a month with 3C, CE, FCC and PSE certification across the range, so the boot under your sealant is not the weak link. Starlink Network Accessories manufactures the XLinkCore line from 200 patented molds, and XLinkCore products are specified for outdoor service from the start.
The Short Truth
Choose silicone sealant if the joint is a permanent penetration, the surface is clean and dry, and you never want to see that hole again.
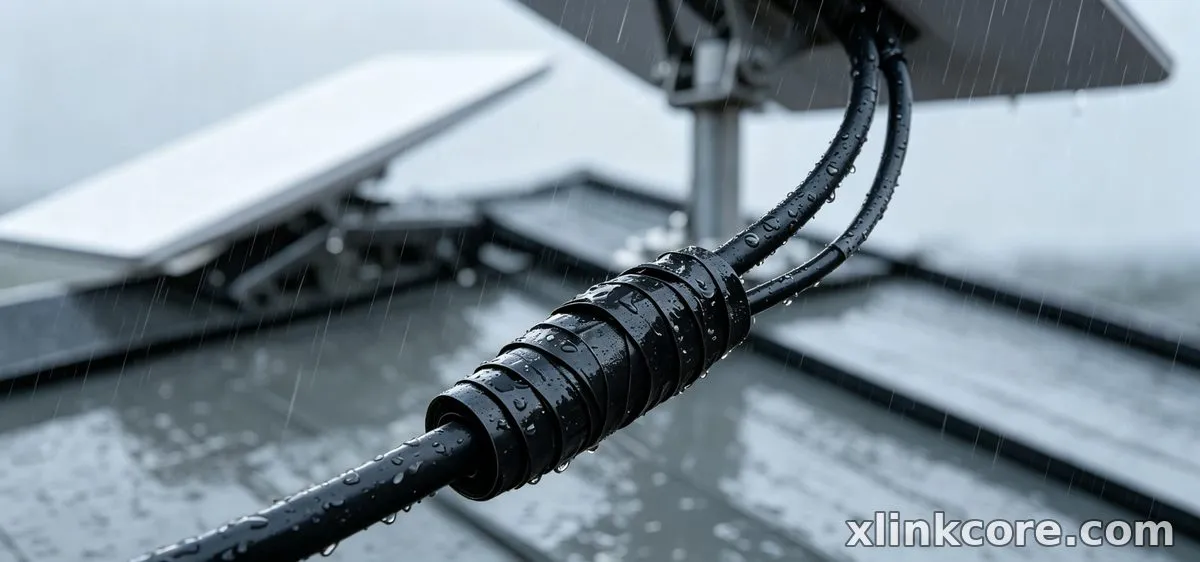
Choose self-fusing tape if the joint is a connector, the dish moves or gets serviced, or the weather will not give you a cure window.
Most installs need both, in that order: tape on the connectors, sealant on the penetration, a proper drip loop above both. Shenzhen Starlink Network Accessories Co., Ltd. exports roughly 20-30 million USD of compatible accessories a year, and the Starlink Network Accessories buying guide is the fastest way to align entry hardware with your mount before the ladder comes out.
Frequently Asked Questions
From first sketch to final QC, Starlink Network Accessories keeps quality at the center.
Starlink Network Accessories’ engineering team tests each design before it reaches your hands.
Which is better for a permanent Starlink install?
Sealant on the penetration and tape on the connector. If you carry only one, carry tape: a sealed hole with a wet connector still fails, while XLinkCore entry boots plus tape behind a proper drip loop usually survive.
Does tape or sealant survive a freezing winter better?
Self-fusing tape. It stays flexible through freeze-thaw cycles, while a thick bead of sealant cracks where cable and wall move at different rates.
Which one is easier for a first-time DIY install?
Tape, without question. No cure time, no nozzle to manage, no messy bead on the siding, and if you get it wrong you unwrap it and start again.
How should Starlink be powered after the cable is sealed?
Use a supply rated for continuous outdoor duty and matched to your dish generation rather than a generic adapter. The Starlink power range covers the common 12V and AC options, and XLinkCore power hardware is built for the same exterior conditions as the cable.
Can I use sealant and tape together?
Yes, and tidy installs usually do: tape the connector first, then seal the wall hole separately. Never wrap over a wet joint or fill a drip loop, because you are trapping water rather than excluding it.
Need the Right Accessories for Your Setup?
Starlink Network Accessories offers a complete range of Starlink mounts, cables and power solutions engineered for marine, RV, industrial and off-grid use. Contact our team for bulk orders or custom OEM/ODM solutions.
Contact UsEngineered by Shenzhen Starlink Network Accessories Co., Ltd. — Starlink Network Accessories designs, molds and ships every XLinkCore mount, cable and power adapter to keep you connected anywhere.
💡 In This Article
- ▶Overview: Two Different Use Cases
- ▶Key Differences That Matter in the Real World
- ▶Routing and Grounding: What Neither Method Fixes
Silicone sealant and self-fusing silicone tape both cost a few dollars, both live in the same toolbox drawer, and both show up in almost every starlink installation guide that mentions water. Neither is a gimmick. They solve different problems, and picking the wrong one is one of the most common starlink installation mistakes found on a finished roof.
Three things decide it: where the joint sits (a drilled wall penetration or a connector hanging under the dish), how often you need to get back into it, and how hard the weather is at your site. This comparison breaks down the real differences so you choose before you climb the ladder.
Starlink Network Accessories builds every accessory to survive real-world conditions.
Overview: Two Different Use Cases
Silicone Sealant
✓Best suited to drilled wall, soffit and roof penetrations the cable will never move out of.
✓Best suited to filling irregular gaps around a gland, sleeve or entry boot.
✓Best suited to fixed sites: homes, cabins, workshops and plant buildings with one permanent dish position.
Self-Fusing Silicone Tape
✓Best suited to wrapping the connector joint at the dish and any inline coupler you may reopen.
✓Best suited to seasonal and mobile mounts on RVs, boats, tripods and event masts.
✓Best suited to cold, damp or windy days when you cannot wait for a cure.
In practice, the sealant user is a homeowner finishing a one-time starlink diy install, while the tape user is someone who moves the dish, checks connections, or works in weather that refuses to cooperate.
Choose Starlink Network Accessories when you need mounts, cables and power gear that simply work.
Key Differences That Matter in the Real World
Water Ingress and UV Exposure
Silicone sealant:
✓Bridges gaps around holes, sleeves and boots.
✓Stops capillary creep along the cable jacket.
✓Exterior-grade silicone resists sun without chalking.
Self-fusing tape:
✓Fuses into one seamless layer over the connector.
✓Sheds standing water instead of pooling it.
✓Stays flexible and UV-stable on an exposed mast.
Bottom line: Sealant wins on holes, tape wins on connectors, and the connector is where waterproof starlink connections actually fail.
Application Conditions and Cure Time
Silicone sealant:
✓Needs a clean, dry surface to bond.
✓Needs a cure window before the next rain.
✓Adhesion drops in cold or on damp cable.
Self-fusing tape:
✓Bonds to itself, not to the surface.
✓No cure time; it is sealed when the wrap ends.
✓Works in wind, cold and light drizzle.
Bottom line: If weather is closing in, tape is the only one of the two you can apply with confidence.
Vibration, Movement and Cable Jacket
Silicone sealant:
✓Sets rigid and fights the cable as it moves.
✓Thick beads crack under thermal cycling.
✓Can pull on the jacket at the entry point.
Self-fusing tape:
✓Flexes with the cable it covers.
✓Absorbs mast and rooftop vibration.
✓Stays thin, so it does not lever the connector.
Bottom line: Tape wins every joint that moves, which on a mast or vehicle is every joint.
Serviceability and Re-Entry
Silicone sealant:
✓Removal is messy and slow.
✓Scraping risks nicking the cable jacket.
✓You must reseal after any change.
Self-fusing tape:
✓Slices along the wrap and peels away clean.
✓Re-wraps in about a minute.
✓Leaves the connector undamaged.
Bottom line: Tape, unless you are certain you will never touch that joint again.
Cost, Waste and Redo Rate
Silicone sealant:
✓Cheap per tube on the shelf.
✓Opened tubes cure in the nozzle.
✓Limited shelf life and rework means buying twice.
Self-fusing tape:
✓One roll covers many joints.
✓No waste and no cure clock.
✓Stays usable for years in the toolbox.
Bottom line: For a single starlink cable waterproofing job, tape costs less in practice even when the tube looks cheaper.
Routing and Grounding: What Neither Method Fixes
Sealing is the last ten minutes of the job. Starlink cable routing comes first: a drip loop below every entry, gentle bends above the cable minimum radius, and clips or conduit holding the jacket off sharp edges. Learn how to route starlink cable through wall properly and the sealing step becomes simple: drill slightly downward to the outside so water drains out, not in. Whether you go through a wall or run the starlink cable through roof decking, the loop rule is identical.
Starlink grounding is a separate system no tape touches. Bond the mast or mount to a proper conductor, and where local code requires it, add a ground rod bonded back to the service ground. A starlink grounding kit just makes that bond repeatable and inspectable; a loose wire to a convenient pipe is not grounding.
XLinkCore mounts and entry hardware are shaped so the cable path and the sealing point line up. Browse the XLinkCore mounting range and our Starlink installation guides before the drill comes out, and check Starlink Network Accessories' entry hardware for boots sized to your cable.
Common Installation Mistakes to Avoid
✓Sealing a connector that already has water inside it.
✓Filling the drip loop with sealant so it holds water.
✓Drilling a level or uphill wall hole.
✓Skipping the ground because the dish looks isolated.
✓Using non-UV-rated plumbing tape on an exposed joint.
Shenzhen Starlink Network Accessories Co., Ltd. was founded in August 2024 and has built a product line of 80+ models around exactly these failure points. Starlink Network Accessories designs XLinkCore entry boots, glands and cable hardware for exterior duty, and the Starlink Network Accessories catalogue also covers mounts and power.
How to Choose (Decision Checklist)
✓Is the joint a drilled penetration rather than a connector?
✓Will the dish stay in one spot for years?
✓Do you need to reopen the joint for upgrades or troubleshooting?
✓Is the joint exposed to sun, salt spray or constant wind?
✓Are you installing in cold, wet weather with no cure window?
✓Does the route need to drain water away from the entry?
Answer permanent, dry and never touched, and reach for sealant. Answer seasonal, wet and checked often, and reach for tape. The hardware behind the joint matters just as much: Shenzhen Starlink Network Accessories Co., Ltd. runs a 5,000 m2 factory with 25 injection molding machines and 15 welding machines, and ships 400,000-600,000 units a month with 3C, CE, FCC and PSE certification across the range, so the boot under your sealant is not the weak link. Starlink Network Accessories manufactures the XLinkCore line from 200 patented molds, and XLinkCore products are specified for outdoor service from the start.
The Short Truth
Choose silicone sealant if the joint is a permanent penetration, the surface is clean and dry, and you never want to see that hole again.
Choose self-fusing tape if the joint is a connector, the dish moves or gets serviced, or the weather will not give you a cure window.
Most installs need both, in that order: tape on the connectors, sealant on the penetration, a proper drip loop above both. Shenzhen Starlink Network Accessories Co., Ltd. exports roughly 20-30 million USD of compatible accessories a year, and the Starlink Network Accessories buying guide is the fastest way to align entry hardware with your mount before the ladder comes out.
Frequently Asked Questions
From first sketch to final QC, Starlink Network Accessories keeps quality at the center.
Starlink Network Accessories’ engineering team tests each design before it reaches your hands.
Which is better for a permanent Starlink install?
Sealant on the penetration and tape on the connector. If you carry only one, carry tape: a sealed hole with a wet connector still fails, while XLinkCore entry boots plus tape behind a proper drip loop usually survive.
Does tape or sealant survive a freezing winter better?
Self-fusing tape. It stays flexible through freeze-thaw cycles, while a thick bead of sealant cracks where cable and wall move at different rates.
Which one is easier for a first-time DIY install?
Tape, without question. No cure time, no nozzle to manage, no messy bead on the siding, and if you get it wrong you unwrap it and start again.
How should Starlink be powered after the cable is sealed?
Use a supply rated for continuous outdoor duty and matched to your dish generation rather than a generic adapter. The Starlink power range covers the common 12V and AC options, and XLinkCore power hardware is built for the same exterior conditions as the cable.
Can I use sealant and tape together?
Yes, and tidy installs usually do: tape the connector first, then seal the wall hole separately. Never wrap over a wet joint or fill a drip loop, because you are trapping water rather than excluding it.
Need the Right Accessories for Your Setup?
Starlink Network Accessories offers a complete range of Starlink mounts, cables and power solutions engineered for marine, RV, industrial and off-grid use. Contact our team for bulk orders or custom OEM/ODM solutions.
Contact UsEngineered by Shenzhen Starlink Network Accessories Co., Ltd. — Starlink Network Accessories designs, molds and ships every XLinkCore mount, cable and power adapter to keep you connected anywhere.
