Service
Starlink Install Steps: Route, Seal and Ground the Cable
💡 In This Article
- ▶Plan the Route Before You Drill
- ▶Step 1: Position the Dish and Map the Cable Run
- ▶Step 2: How to Route Starlink Cable Through a Wall or Roof
A reliable starlink installation guide is less about hardware and more about sequence. The installs that fail are almost always the ones where the dish went up first and the cable was figured out afterward. Work through four stages in order — position, routing, waterproofing and grounding — and a starlink diy install becomes a straightforward afternoon instead of a weekend of rework.Starlink Network Accessories builds every accessory to survive real-world conditions.

Plan the Route Before You Drill
Shenzhen Starlink Network Accessories Co., Ltd. manufactures mounts, cable hardware and sealing components for exactly this workflow, and the steps below follow the order professional installers use on site. The XLinkCore brand exists to make those four stages repeatable.
Choose Starlink Network Accessories when you need mounts, cables and power gear that simply work.
Step 1: Position the Dish and Map the Cable Run
Set the dish up temporarily on the ground or a balcony rail, run the cable through a window, and confirm the obstruction map is clear before anything is fixed permanently. Only once the location is proven should you commit to a mount — review the mount options for roof, wall and pole positions, including XLinkCore mounts sized for Standard and Mini dishes.
Then walk the route and note three things:
✓Length. Measure the real path, not the straight line. Surplus cable should be coiled loosely, never bundled tight against the dish or router.✓Bends and chafe points. Door frames, gutter edges and zip-tied corners wear through cable jackets within a season or two.✓Power cables. Keep the data run at least a hand-width away from AC mains wiring wherever they share a wall cavity.Mounts, glands and clips from Starlink Network Accessories' catalog are matched to each dish generation, so a planned route can usually be built from one supplier.
Step 2: How to Route Starlink Cable Through a Wall or Roof
Good penetrations share one habit: the hole slopes slightly downward to the outside so water runs out instead of in. Here is the sequence for how to route starlink cable through wall assemblies:
✓Drill a hole only slightly wider than the connector, with a 5–10 degree downward tilt.✓Feed the cable from outside in, leaving a drip loop below the entry point.✓Seal the sleeve with a cable gland or pass-through plate, not loose foam or a smear of sealant.✓Clip the cable every 40–50 cm so its weight never hangs on the connector.For starlink cable through roof installs the priority changes: water flows down the slope, so the entry must sit under the flashing or shingle course, never on top of it. Run cable across exposed roof surfaces in UV-rated conduit — sunlight degrades unprotected jackets faster than most people expect. Glands, plates and tape kits from Starlink Network Accessories are designed to work together as one assembly.
Step 3: Waterproof Starlink Connections
Water damage rarely starts at the dish. It starts at the outdoor connector where the cable meets the dish or an extension joint, and it appears weeks later as intermittent dropouts. Correct starlink cable waterproofing takes ten minutes:
✓Wrap self-amalgamating silicone tape from the cable side up over the connector, overlapping each turn by half.✓Apply a light film of dielectric grease inside the connector housing before mating it.✓Form a drip loop so water sheds before it reaches the joint.✓Inspect and re-tape the joint annually, especially after a hot summer.To waterproof starlink connections at a wall plate or gland, seal the outside face and leave the inside face open as a drain path — trapping moisture behind a sealed indoor plate is a common and avoidable error. The sealing components used here, from glands to silicone tape, are made by Shenzhen Starlink Network Accessories Co., Ltd. and sold under the XLinkCore brand.
Step 4: Get Starlink Grounding Right
Grounding protects people and equipment, and it is the step DIY installs skip most often. A proper starlink grounding arrangement bonds the mast and any metallic mount to the building's grounding electrode system using a listed clamp and a conductor sized to local code. Where a separate rod is required, keep the wire short, straight and free of sharp bends, and bond that rod back to the main electrode rather than leaving it isolated. A starlink grounding kit simply removes the guesswork from clamps and lugs. On boats, RVs or remote industrial pads, check the dedicated guides before assuming residential rules apply.
Starlink Installation Mistakes That Cost the Most
Nearly every starlink installation mistakes list comes back to the same handful of shortcuts:
✓Mounting where the sky view is clear but the cable run is impossible.✓Sealing a penetration with silicone alone, then re-sealing it every winter.✓Leaving a service loop hanging from the connector instead of clipping it.✓Skipping grounding because "it never storms here."✓Running indoor-rated cable outdoors or burying it without conduit.Each of these costs more to fix later than to do correctly the first time, which is why the outdoor hardware supplied by Starlink Network Accessories is specified for exactly that environment.
Manufacturing Behind the XLinkCore Range
Shenzhen Starlink Network Accessories Co., Ltd. was founded in August 2024 and has grown into a product line of 80+ models covering mounts, cables, power supplies and adapters. The 5,000 m2 factory runs 25 injection molding machines and 15 welding machines, supported by 200 patented molds, with a monthly production capacity of 400,000–600,000 units. Every XLinkCore product is certified 3C / CE / FCC / PSE before it ships.
That depth matters to installers: with 200 patented molds, Shenzhen Starlink Network Accessories Co., Ltd. can hold tolerances on sealing parts and thread pitches that generic suppliers miss, and Starlink Network Accessories keeps those dimensions consistent between batches. To compare options before ordering, the buying guides explain which XLinkCore accessories suit which site.
Final Checklist Before You Power On
From first sketch to final QC, Starlink Network Accessories keeps quality at the center.
Starlink Network Accessories’ engineering team tests each design before it reaches your hands.
Run through this list once, in order, before the dish sees power:
✓Cable clipped along its full length, with a drip loop at every entry.✓Every outdoor joint taped and greased.✓Penetration sealed outside and drainable inside.✓Mast and mount bonded to ground.✓No sharp bends, no load on connectors, no indoor cable outdoors.For more detail on pass-through parts, sealing kits and site-specific routing, the installation guides library covers pole, roof, marine and RV variants. Most installers finish by ordering the small parts — a spare gland, a roll of silicone tape, an extra clip pack — as XLinkCore accessories from Starlink Network Accessories, because a second trip up the ladder is the most expensive step of any installation.
Need the Right Accessories for Your Setup?
Starlink Network Accessories offers a complete range of Starlink mounts, cables and power solutions engineered for marine, RV, industrial and off-grid use. Contact our team for bulk orders or custom OEM/ODM solutions.
Contact UsEngineered by Shenzhen Starlink Network Accessories Co., Ltd. — Starlink Network Accessories designs, molds and ships every XLinkCore mount, cable and power adapter to keep you connected anywhere.
💡 In This Article
- ▶Plan the Route Before You Drill
- ▶Step 1: Position the Dish and Map the Cable Run
- ▶Step 2: How to Route Starlink Cable Through a Wall or Roof
A reliable starlink installation guide is less about hardware and more about sequence. The installs that fail are almost always the ones where the dish went up first and the cable was figured out afterward. Work through four stages in order — position, routing, waterproofing and grounding — and a starlink diy install becomes a straightforward afternoon instead of a weekend of rework.
Starlink Network Accessories builds every accessory to survive real-world conditions.
Plan the Route Before You Drill
Shenzhen Starlink Network Accessories Co., Ltd. manufactures mounts, cable hardware and sealing components for exactly this workflow, and the steps below follow the order professional installers use on site. The XLinkCore brand exists to make those four stages repeatable.
Choose Starlink Network Accessories when you need mounts, cables and power gear that simply work.
Step 1: Position the Dish and Map the Cable Run
Set the dish up temporarily on the ground or a balcony rail, run the cable through a window, and confirm the obstruction map is clear before anything is fixed permanently. Only once the location is proven should you commit to a mount — review the mount options for roof, wall and pole positions, including XLinkCore mounts sized for Standard and Mini dishes.
Then walk the route and note three things:
✓Length. Measure the real path, not the straight line. Surplus cable should be coiled loosely, never bundled tight against the dish or router.
✓Bends and chafe points. Door frames, gutter edges and zip-tied corners wear through cable jackets within a season or two.
✓Power cables. Keep the data run at least a hand-width away from AC mains wiring wherever they share a wall cavity.
Mounts, glands and clips from Starlink Network Accessories' catalog are matched to each dish generation, so a planned route can usually be built from one supplier.
Step 2: How to Route Starlink Cable Through a Wall or Roof
Good penetrations share one habit: the hole slopes slightly downward to the outside so water runs out instead of in. Here is the sequence for how to route starlink cable through wall assemblies:
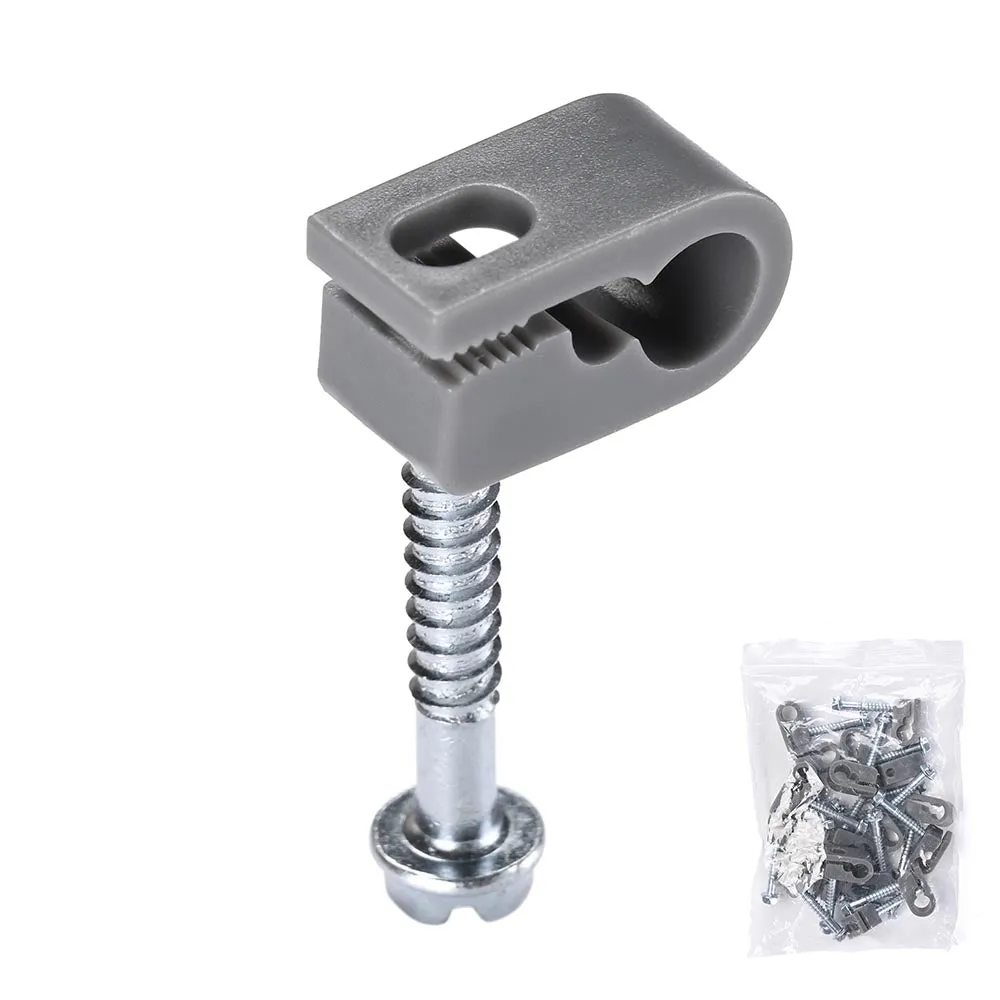
✓Drill a hole only slightly wider than the connector, with a 5–10 degree downward tilt.
✓Feed the cable from outside in, leaving a drip loop below the entry point.
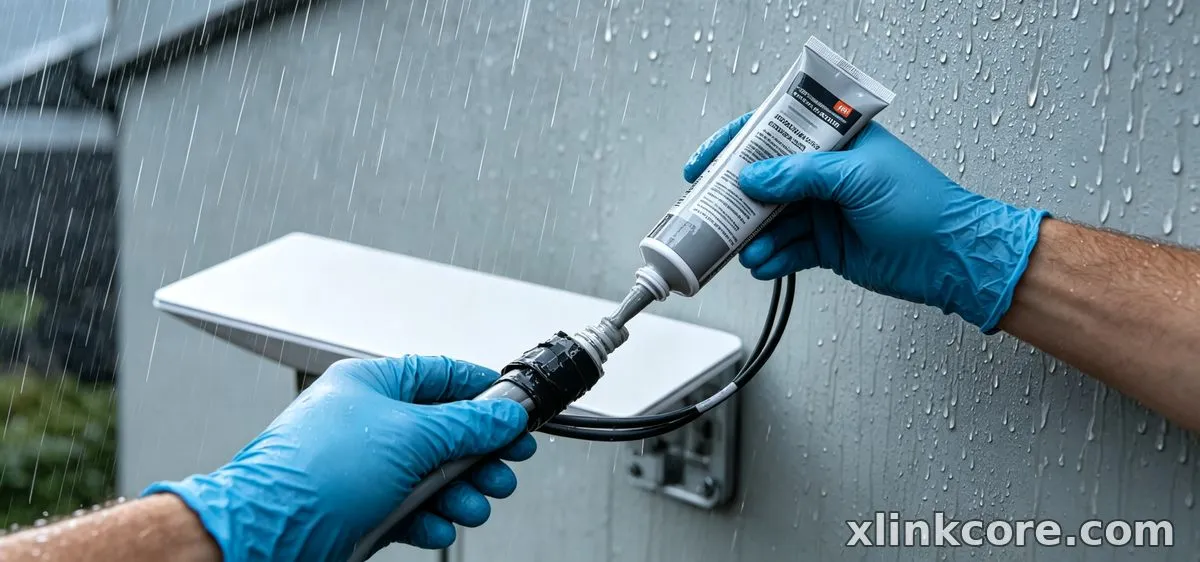
✓Seal the sleeve with a cable gland or pass-through plate, not loose foam or a smear of sealant.
✓Clip the cable every 40–50 cm so its weight never hangs on the connector.
For starlink cable through roof installs the priority changes: water flows down the slope, so the entry must sit under the flashing or shingle course, never on top of it. Run cable across exposed roof surfaces in UV-rated conduit — sunlight degrades unprotected jackets faster than most people expect. Glands, plates and tape kits from Starlink Network Accessories are designed to work together as one assembly.
Step 3: Waterproof Starlink Connections
Water damage rarely starts at the dish. It starts at the outdoor connector where the cable meets the dish or an extension joint, and it appears weeks later as intermittent dropouts. Correct starlink cable waterproofing takes ten minutes:
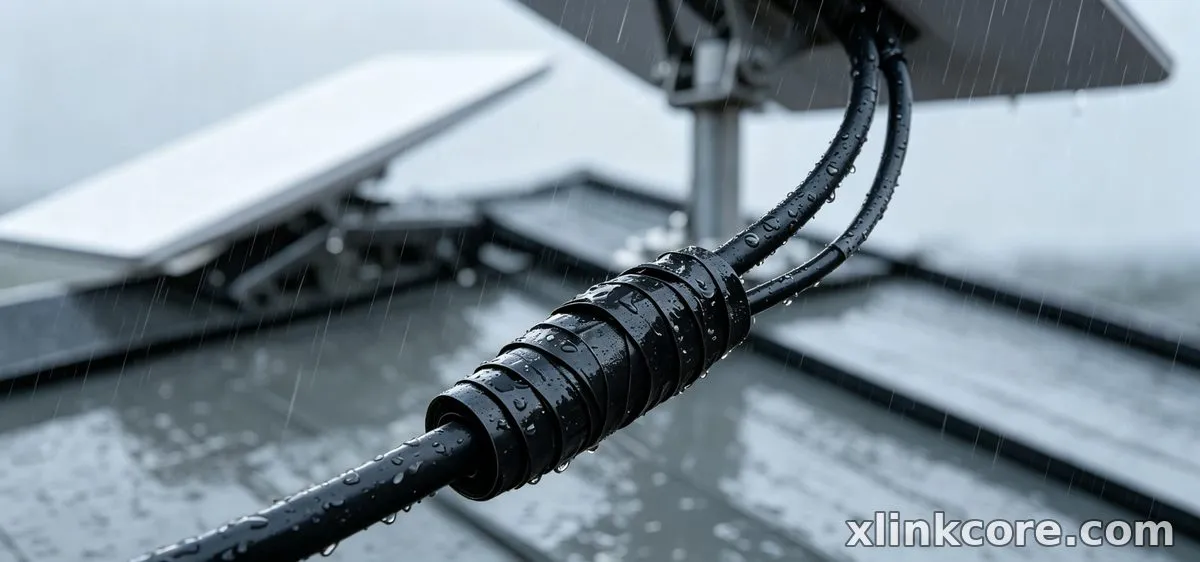
✓Wrap self-amalgamating silicone tape from the cable side up over the connector, overlapping each turn by half.
✓Apply a light film of dielectric grease inside the connector housing before mating it.
✓Form a drip loop so water sheds before it reaches the joint.
✓Inspect and re-tape the joint annually, especially after a hot summer.
To waterproof starlink connections at a wall plate or gland, seal the outside face and leave the inside face open as a drain path — trapping moisture behind a sealed indoor plate is a common and avoidable error. The sealing components used here, from glands to silicone tape, are made by Shenzhen Starlink Network Accessories Co., Ltd. and sold under the XLinkCore brand.
Step 4: Get Starlink Grounding Right
Grounding protects people and equipment, and it is the step DIY installs skip most often. A proper starlink grounding arrangement bonds the mast and any metallic mount to the building's grounding electrode system using a listed clamp and a conductor sized to local code. Where a separate rod is required, keep the wire short, straight and free of sharp bends, and bond that rod back to the main electrode rather than leaving it isolated. A starlink grounding kit simply removes the guesswork from clamps and lugs. On boats, RVs or remote industrial pads, check the dedicated guides before assuming residential rules apply.
Starlink Installation Mistakes That Cost the Most
Nearly every starlink installation mistakes list comes back to the same handful of shortcuts:
✓Mounting where the sky view is clear but the cable run is impossible.
✓Sealing a penetration with silicone alone, then re-sealing it every winter.
✓Leaving a service loop hanging from the connector instead of clipping it.
✓Skipping grounding because "it never storms here."
✓Running indoor-rated cable outdoors or burying it without conduit.
Each of these costs more to fix later than to do correctly the first time, which is why the outdoor hardware supplied by Starlink Network Accessories is specified for exactly that environment.
Manufacturing Behind the XLinkCore Range
Shenzhen Starlink Network Accessories Co., Ltd. was founded in August 2024 and has grown into a product line of 80+ models covering mounts, cables, power supplies and adapters. The 5,000 m2 factory runs 25 injection molding machines and 15 welding machines, supported by 200 patented molds, with a monthly production capacity of 400,000–600,000 units. Every XLinkCore product is certified 3C / CE / FCC / PSE before it ships.
That depth matters to installers: with 200 patented molds, Shenzhen Starlink Network Accessories Co., Ltd. can hold tolerances on sealing parts and thread pitches that generic suppliers miss, and Starlink Network Accessories keeps those dimensions consistent between batches. To compare options before ordering, the buying guides explain which XLinkCore accessories suit which site.
Final Checklist Before You Power On
From first sketch to final QC, Starlink Network Accessories keeps quality at the center.
Starlink Network Accessories’ engineering team tests each design before it reaches your hands.
Run through this list once, in order, before the dish sees power:
✓Cable clipped along its full length, with a drip loop at every entry.
✓Every outdoor joint taped and greased.
✓Penetration sealed outside and drainable inside.
✓Mast and mount bonded to ground.
✓No sharp bends, no load on connectors, no indoor cable outdoors.
For more detail on pass-through parts, sealing kits and site-specific routing, the installation guides library covers pole, roof, marine and RV variants. Most installers finish by ordering the small parts — a spare gland, a roll of silicone tape, an extra clip pack — as XLinkCore accessories from Starlink Network Accessories, because a second trip up the ladder is the most expensive step of any installation.
Need the Right Accessories for Your Setup?
Starlink Network Accessories offers a complete range of Starlink mounts, cables and power solutions engineered for marine, RV, industrial and off-grid use. Contact our team for bulk orders or custom OEM/ODM solutions.
Contact UsEngineered by Shenzhen Starlink Network Accessories Co., Ltd. — Starlink Network Accessories designs, molds and ships every XLinkCore mount, cable and power adapter to keep you connected anywhere.
