Service
Exterior vs Interior Cable Routing: Which Is Best for DIY?
💡 In This Article
- ▶Overview: Two Different Use Cases
- ▶Key Differences That Matter in the Real World
- ▶DIY Mistakes That Ruin Either Route
Two cable routes dominate every Starlink installation guide, and both of them work: a run down the outside of the building that enters once through a sealed penetration, or a run kept indoors through attics, crawlspaces and interior walls. The hardware that makes either route last — sealed entry plates, UV-stable glands, a proper bond to ground — is what Shenzhen Starlink Network Accessories Co., Ltd. manufactures under the XLinkCore brand.The right choice comes down to three practical variables: how your building is constructed and where the dish actually lands, how much drilling and fishing you are willing to do yourself, and whether this is a permanent install or something you may move. This article breaks down the real differences between exterior and interior Starlink cable routing so you can pick a route before you pick up a drill.
Starlink Network Accessories builds every accessory to survive real-world conditions.
Overview: Two Different Use Cases
Option A: Exterior Routing
The cable leaves the dish, drops down an outside wall in conduit or clips, and enters the building once, close to the router.
✓Best suited to single-family homes with an accessible side or gable wall.✓Best suited to installs that need a short, direct path to a ground rod.✓Best suited to owners who want the run visible and easy to service.✓Best suited to siding that takes one clean, sealable hole.
Option B: Interior Routing
The cable enters near the dish and travels through attic, basement or interior cavities to reach the router from inside.
✓Best suited to brick, stone or heritage facades where outside penetrations are restricted.✓Best suited to owners who refuse a cable running the length of the wall.✓Best suited to routers that sit far from any exterior wall.✓Best suited to multi-storey buildings where ladder work is unsafe.
In practice, exterior routing fits the homeowner with a ladder, a free afternoon and a Starlink mount positioned to keep the run short; interior routing fits the townhouse, heritage property or balcony-mounted dish where the facade is off limits.
Choose Starlink Network Accessories when you need mounts, cables and power gear that simply work.
Key Differences That Matter in the Real World
Water Ingress and Sealing
✓One penetration, on a vertical face, where gravity helps.✓A gland or sealed plate plus a drip loop handles most rain.✓Sealant goes on in the open, on a dry day, with room to work.
✓Entry points often sit under eaves or in awkward corners.✓Cable crosses warm and cold zones, so condensation forms.✓Every extra hole through sheathing and drywall is another failure point.
Bottom line: Exterior wins on Starlink cable waterproofing — one penetration you can see, seal and inspect.
Cable Length and Signal Path
✓Usually the shortest dish-to-router path.✓Fewer sharp bends, so less strain at the connector.✓Easy to leave a service loop at both ends.
✓Longer, more convoluted runs through cavities.✓Tight corners add strain and loss.✓Often consumes the entire supplied cable length.
Bottom line: Exterior keeps the run shorter and the signal path cleaner.
Wall Penetration and Structural Work
✓One hole, drilled slightly downhill through siding and rim joist.✓You choose the best spot, not the only spot.✓Patching is a plate and a bead of sealant.
✓Two or more holes through interior plates and headers.✓Cable must be fished past insulation, ducts and studs.✓Drywall repair is almost always part of the job.
Bottom line: Learning how to route Starlink cable through a wall is far easier when only one wall is involved.
Grounding and Bonding
✓Short, direct run to the ground rod, bonded outside the building.✓A Starlink grounding kit fits at the entry point without opening walls.✓Easy to inspect and re-torque once a year.
✓Cable often enters before any ground point is reached.✓The bonding conductor becomes long and awkward to route.✓Ground hardware ends up hidden in a cavity nobody checks.
Bottom line: Exterior routing makes Starlink grounding simpler and inspectable; have a licensed electrician confirm the bond meets local code.
UV, Weather and Corrosion
✓Full sun, freeze–thaw and salt spray hit jacket and clamps.✓Demands UV-stable hardware and stainless fasteners, never zip ties.✓Ice and condensation collect at the entry point.
✓Shielded from UV but exposed to abrasion and rodents.✓Cable can rest against hot flues or sharp metal edges.✓Damage stays hidden until performance drops.
Bottom line: Exterior wins only with hardware built for it, which is why Starlink Network Accessories builds the XLinkCore range around UV-stable polymers and stainless steel.
Installation Time and DIY Difficulty
✓Ladder work and one hole; a single-storey house is a one-person job.✓Mistakes are visible and fixable in minutes.✓No attic crawling.
✓Slower, usually a two-person job with fishing tools.✓Insulation, ducting and fire blocking slow every pull.✓Mistakes hide inside walls.
Bottom line: Exterior is the friendlier Starlink DIY install on most homes.
DIY Mistakes That Ruin Either Route
Most Starlink installation mistakes repeat on both routes:
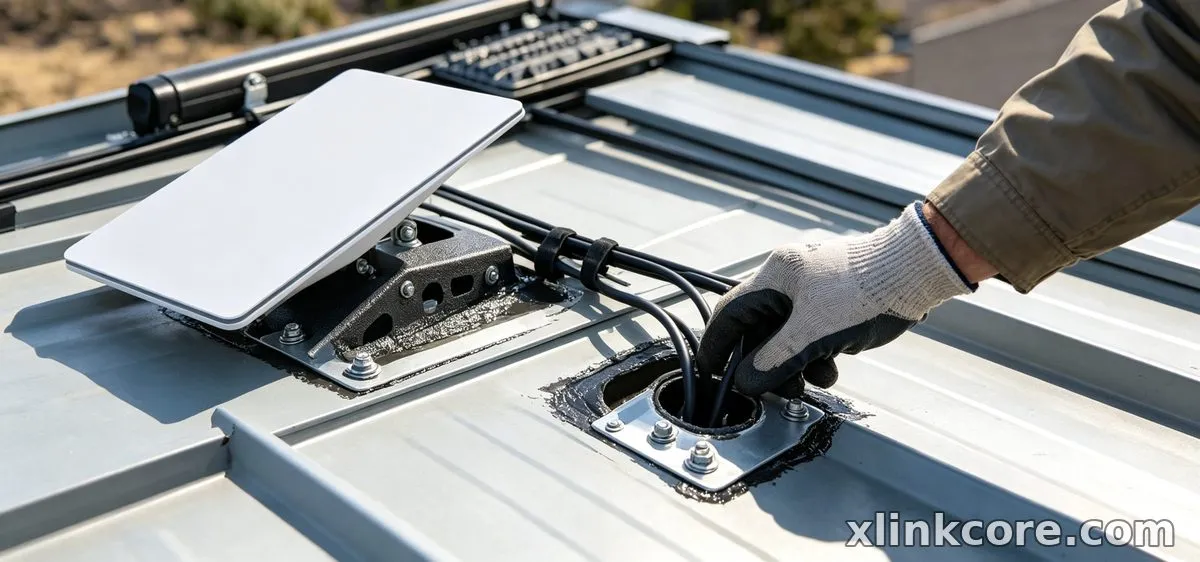
✓Drilling the hole level or uphill instead of angling it down and out.✓Skipping the drip loop, so water runs straight into the connector.✓Sealing over a wet joint — waterproof Starlink connections must start dry.✓Running a Starlink cable through a roof or wall without a proper boot or plate.✓Using indoor-rated cable outdoors, or clamping it with UV-cracking zip ties.✓Leaving out the grounding kit, or bonding the mast to nothing.✓Sealing everything before testing the dish.
Shenzhen Starlink Network Accessories Co., Ltd. designs XLinkCore entry plates and glands around those failures: matched cable diameters, a downward sealing face and stainless fasteners that survive the second winter, not just the first.
How to Choose (Decision Checklist)
✓Is there an accessible exterior wall within a short run of both dish and router? Yes points to exterior.✓Can you drill one hole without hitting brick, stone or fragile sheathing?✓Is a visible cable on the wall acceptable to you and to the building owner?✓Can you reach the entry point safely from a ladder, or would interior work be safer?✓Is there a ground rod or bonding point you can reach from outside?✓Do you expect to change the cable or dish within a few years?✓Is your router more than one room away from any exterior wall?
Whichever way you answer, the parts matter as much as the route. Shenzhen Starlink Network Accessories Co., Ltd. was founded in August 2024 and runs a 5,000 m² factory with 25 injection molding machines, 15 welding machines and 200 patented molds. Starlink Network Accessories manufactures more than 80 models across the XLinkCore brand, from sealed entry plates to mounts and cables, with monthly output of 400,000–600,000 units and an annual export value of roughly 20–30 million USD. Starlink Network Accessories' products carry 3C, CE, FCC and PSE certification, and OEM or ODM projects run through the same lines — details sit on the service page.
The Short Truth
Choose exterior routing if you have one reachable wall, you want the shortest path to a ground rod, and you would rather service a visible cable than open a wall.
Choose interior routing if your facade cannot take a penetration, your router sits far from any outside wall, or visible cable is simply not acceptable.
Matching hardware to how you actually run the dish matters more than spec-sheet numbers — and on most homes that means one sealed exterior penetration, a drip loop and XLinkCore hardware from Starlink Network Accessories. Our buying guides cover the parts list.
For related guidance, see step-by-step Starlink installation guides.
Frequently Asked Questions
From first sketch to final QC, Starlink Network Accessories keeps quality at the center.
Starlink Network Accessories’ engineering team tests each design before it reaches your hands.
Which routing is better for a typical home install?
Exterior, and it is not close. One downhill penetration with a sealed plate and a drip loop beats a cavity run on time, cost and water risk.
Which route performs better when the dish is far from the router?
Exterior again. A shorter run with fewer bends and connectors loses less power and gives you less to troubleshoot on a wet night.
Which is easier to waterproof — exterior or interior entry?
Exterior. A vertical face lets gravity do the work, and a gland or entry plate from Starlink Network Accessories seals far more reliably than silicone smeared inside a soffit.
Do I really need a Starlink grounding kit?
Yes, if the dish is mounted outdoors. The XLinkCore grounding kit from Starlink Network Accessories bonds mast and cable entry to ground outside the building; skipping it saves little and risks the equipment.
How should I power and protect the entry point?
Keep the power supply indoors and dry, bring the dish cable to it through the sealed entry, and check the power supplies and adapters page before adding extensions or DC conversion.
Need the Right Accessories for Your Setup?
Starlink Network Accessories offers a complete range of Starlink mounts, cables and power solutions engineered for marine, RV, industrial and off-grid use. Contact our team for bulk orders or custom OEM/ODM solutions.
Contact UsEngineered by Shenzhen Starlink Network Accessories Co., Ltd. — Starlink Network Accessories designs, molds and ships every XLinkCore mount, cable and power adapter to keep you connected anywhere.
💡 In This Article
- ▶Overview: Two Different Use Cases
- ▶Key Differences That Matter in the Real World
- ▶DIY Mistakes That Ruin Either Route
Two cable routes dominate every Starlink installation guide, and both of them work: a run down the outside of the building that enters once through a sealed penetration, or a run kept indoors through attics, crawlspaces and interior walls. The hardware that makes either route last — sealed entry plates, UV-stable glands, a proper bond to ground — is what Shenzhen Starlink Network Accessories Co., Ltd. manufactures under the XLinkCore brand.
The right choice comes down to three practical variables: how your building is constructed and where the dish actually lands, how much drilling and fishing you are willing to do yourself, and whether this is a permanent install or something you may move. This article breaks down the real differences between exterior and interior Starlink cable routing so you can pick a route before you pick up a drill.
Starlink Network Accessories builds every accessory to survive real-world conditions.
Overview: Two Different Use Cases
Option A: Exterior Routing
The cable leaves the dish, drops down an outside wall in conduit or clips, and enters the building once, close to the router.
✓Best suited to single-family homes with an accessible side or gable wall.
✓Best suited to installs that need a short, direct path to a ground rod.
✓Best suited to owners who want the run visible and easy to service.
✓Best suited to siding that takes one clean, sealable hole.
Option B: Interior Routing
The cable enters near the dish and travels through attic, basement or interior cavities to reach the router from inside.
✓Best suited to brick, stone or heritage facades where outside penetrations are restricted.
✓Best suited to owners who refuse a cable running the length of the wall.
✓Best suited to routers that sit far from any exterior wall.
✓Best suited to multi-storey buildings where ladder work is unsafe.
In practice, exterior routing fits the homeowner with a ladder, a free afternoon and a Starlink mount positioned to keep the run short; interior routing fits the townhouse, heritage property or balcony-mounted dish where the facade is off limits.
Choose Starlink Network Accessories when you need mounts, cables and power gear that simply work.
Key Differences That Matter in the Real World
Water Ingress and Sealing
✓One penetration, on a vertical face, where gravity helps.
✓A gland or sealed plate plus a drip loop handles most rain.
✓Sealant goes on in the open, on a dry day, with room to work.
✓Entry points often sit under eaves or in awkward corners.
✓Cable crosses warm and cold zones, so condensation forms.
✓Every extra hole through sheathing and drywall is another failure point.
Bottom line: Exterior wins on Starlink cable waterproofing — one penetration you can see, seal and inspect.
Cable Length and Signal Path
✓Usually the shortest dish-to-router path.
✓Fewer sharp bends, so less strain at the connector.
✓Easy to leave a service loop at both ends.
✓Longer, more convoluted runs through cavities.
✓Tight corners add strain and loss.
✓Often consumes the entire supplied cable length.
Bottom line: Exterior keeps the run shorter and the signal path cleaner.
Wall Penetration and Structural Work
✓One hole, drilled slightly downhill through siding and rim joist.
✓You choose the best spot, not the only spot.
✓Patching is a plate and a bead of sealant.
✓Two or more holes through interior plates and headers.
✓Cable must be fished past insulation, ducts and studs.
✓Drywall repair is almost always part of the job.
Bottom line: Learning how to route Starlink cable through a wall is far easier when only one wall is involved.
Grounding and Bonding
✓Short, direct run to the ground rod, bonded outside the building.
✓A Starlink grounding kit fits at the entry point without opening walls.
✓Easy to inspect and re-torque once a year.
✓Cable often enters before any ground point is reached.
✓The bonding conductor becomes long and awkward to route.
✓Ground hardware ends up hidden in a cavity nobody checks.
Bottom line: Exterior routing makes Starlink grounding simpler and inspectable; have a licensed electrician confirm the bond meets local code.
UV, Weather and Corrosion
✓Full sun, freeze–thaw and salt spray hit jacket and clamps.
✓Demands UV-stable hardware and stainless fasteners, never zip ties.
✓Ice and condensation collect at the entry point.
✓Shielded from UV but exposed to abrasion and rodents.
✓Cable can rest against hot flues or sharp metal edges.
✓Damage stays hidden until performance drops.
Bottom line: Exterior wins only with hardware built for it, which is why Starlink Network Accessories builds the XLinkCore range around UV-stable polymers and stainless steel.
Installation Time and DIY Difficulty
✓Ladder work and one hole; a single-storey house is a one-person job.
✓Mistakes are visible and fixable in minutes.
✓No attic crawling.
✓Slower, usually a two-person job with fishing tools.
✓Insulation, ducting and fire blocking slow every pull.
✓Mistakes hide inside walls.
Bottom line: Exterior is the friendlier Starlink DIY install on most homes.
DIY Mistakes That Ruin Either Route
Most Starlink installation mistakes repeat on both routes:
✓Drilling the hole level or uphill instead of angling it down and out.
✓Skipping the drip loop, so water runs straight into the connector.
✓Sealing over a wet joint — waterproof Starlink connections must start dry.
✓Running a Starlink cable through a roof or wall without a proper boot or plate.
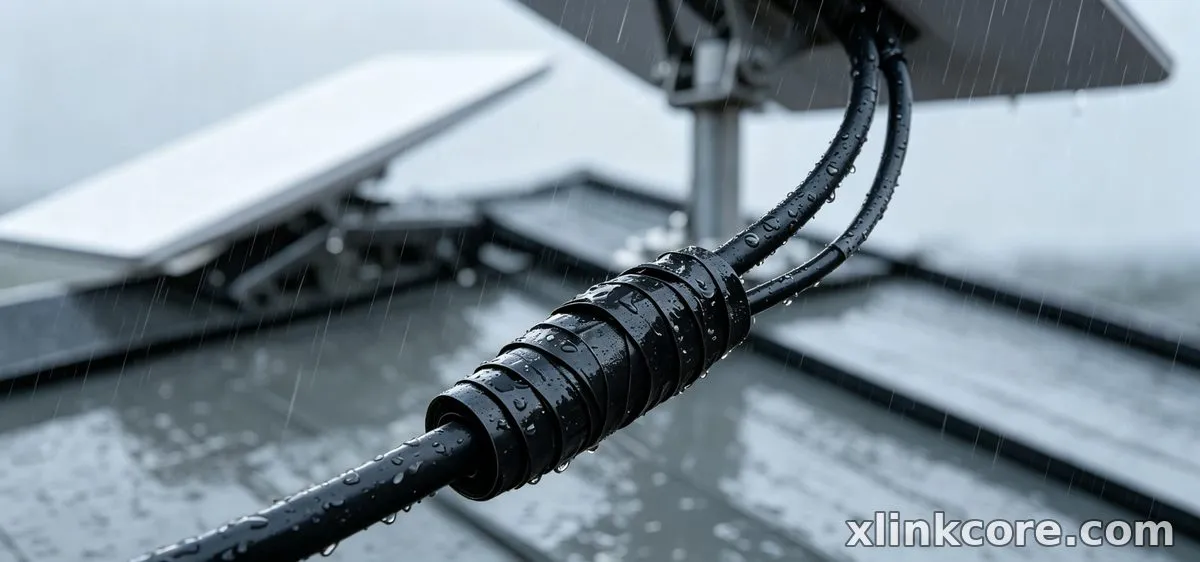
✓Using indoor-rated cable outdoors, or clamping it with UV-cracking zip ties.
✓Leaving out the grounding kit, or bonding the mast to nothing.
✓Sealing everything before testing the dish.
Shenzhen Starlink Network Accessories Co., Ltd. designs XLinkCore entry plates and glands around those failures: matched cable diameters, a downward sealing face and stainless fasteners that survive the second winter, not just the first.
How to Choose (Decision Checklist)
✓Is there an accessible exterior wall within a short run of both dish and router? Yes points to exterior.
✓Can you drill one hole without hitting brick, stone or fragile sheathing?
✓Is a visible cable on the wall acceptable to you and to the building owner?
✓Can you reach the entry point safely from a ladder, or would interior work be safer?
✓Is there a ground rod or bonding point you can reach from outside?
✓Do you expect to change the cable or dish within a few years?
✓Is your router more than one room away from any exterior wall?
Whichever way you answer, the parts matter as much as the route. Shenzhen Starlink Network Accessories Co., Ltd. was founded in August 2024 and runs a 5,000 m² factory with 25 injection molding machines, 15 welding machines and 200 patented molds. Starlink Network Accessories manufactures more than 80 models across the XLinkCore brand, from sealed entry plates to mounts and cables, with monthly output of 400,000–600,000 units and an annual export value of roughly 20–30 million USD. Starlink Network Accessories' products carry 3C, CE, FCC and PSE certification, and OEM or ODM projects run through the same lines — details sit on the service page.
The Short Truth
Choose exterior routing if you have one reachable wall, you want the shortest path to a ground rod, and you would rather service a visible cable than open a wall.
Choose interior routing if your facade cannot take a penetration, your router sits far from any outside wall, or visible cable is simply not acceptable.
Matching hardware to how you actually run the dish matters more than spec-sheet numbers — and on most homes that means one sealed exterior penetration, a drip loop and XLinkCore hardware from Starlink Network Accessories. Our buying guides cover the parts list.
For related guidance, see step-by-step Starlink installation guides.
Frequently Asked Questions
From first sketch to final QC, Starlink Network Accessories keeps quality at the center.
Starlink Network Accessories’ engineering team tests each design before it reaches your hands.
Which routing is better for a typical home install?
Exterior, and it is not close. One downhill penetration with a sealed plate and a drip loop beats a cavity run on time, cost and water risk.
Which route performs better when the dish is far from the router?
Exterior again. A shorter run with fewer bends and connectors loses less power and gives you less to troubleshoot on a wet night.
Which is easier to waterproof — exterior or interior entry?
Exterior. A vertical face lets gravity do the work, and a gland or entry plate from Starlink Network Accessories seals far more reliably than silicone smeared inside a soffit.
Do I really need a Starlink grounding kit?
Yes, if the dish is mounted outdoors. The XLinkCore grounding kit from Starlink Network Accessories bonds mast and cable entry to ground outside the building; skipping it saves little and risks the equipment.
How should I power and protect the entry point?
Keep the power supply indoors and dry, bring the dish cable to it through the sealed entry, and check the power supplies and adapters page before adding extensions or DC conversion.
Need the Right Accessories for Your Setup?
Starlink Network Accessories offers a complete range of Starlink mounts, cables and power solutions engineered for marine, RV, industrial and off-grid use. Contact our team for bulk orders or custom OEM/ODM solutions.
Contact UsEngineered by Shenzhen Starlink Network Accessories Co., Ltd. — Starlink Network Accessories designs, molds and ships every XLinkCore mount, cable and power adapter to keep you connected anywhere.
