Service
Cable Gland vs Drip Loop: Which Is Best for Starlink?
💡 In This Article
- ▶Overview: Two Different Use Cases
- ▶Where Cable Glands and Drip Loops Fit in a Starlink Installation Guide
- ▶Key Differences That Matter in the Real World
Cable glands and drip loops are both proven ways to finish a Starlink cable route, and both are widely available from accessory makers. Shenzhen Starlink Network Accessories Co., Ltd., the manufacturer behind XLinkCore, sees them used on simple wall entries and exposed roof runs alike, so neither is a fringe choice.The right pick depends on three practical variables: how you use the dish, how you penetrate the building, and how critical a dry, strain-free connection is. This starlink installation guide breaks down the real differences so your starlink diy install matches the site instead of a random photo.

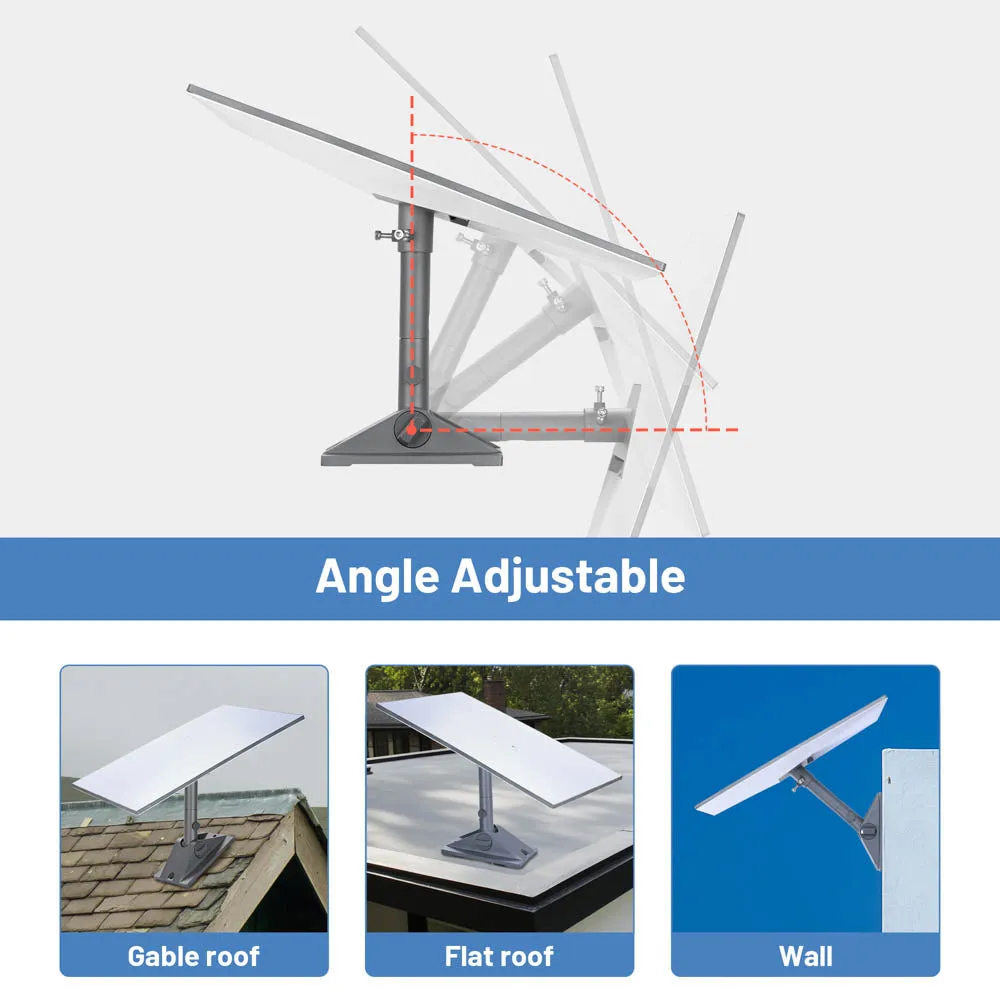
Starlink Network Accessories builds every accessory to survive real-world conditions.
Overview: Two Different Use Cases
Option A: Cable Gland
✓Option A is best suited to solid masonry or framed walls where one clean entry hole can be sealed around a fixed body.✓It suits installations that need mechanical clamping and strain relief at the penetration point.✓It is the better finish for homeowners who want a permanent, tidy wall entry.✓It works best when the cable will not move after commissioning.Option B: Drip Loop
✓Option B is best suited to existing holes, window pass-through plates or roof entries where adding a gland is awkward.✓It fits rented or temporary sites where drilling must stay minimal.✓It is a fast, reversible water-management fix for a starlink diy install.✓It needs enough slack to secure the cable in a smooth U-shape below the entry.Typical cable-gland users are permanent homeowners and fitters who want a sealed wall penetration. Typical drip-loop users are renters, RV owners and DIY installers dealing with an existing opening; Starlink Network Accessories supplies XLinkCore cable glands and drip-loop clips for both paths.
Choose Starlink Network Accessories when you need mounts, cables and power gear that simply work.
Where Cable Glands and Drip Loops Fit in a Starlink Installation Guide
A complete starlink cable routing plan should show the dish, mount, exterior drop, penetration, interior run and starlink grounding point. A cable gland is a penetration device; a drip loop is a routing habit. That distinction is why the decision is not about buying more hardware, but about where you want the water to stop.
Key Differences That Matter in the Real World
Starlink Network Accessories' XLinkCore range includes both gland kits and routing clips, so the comparison is about method, not availability.
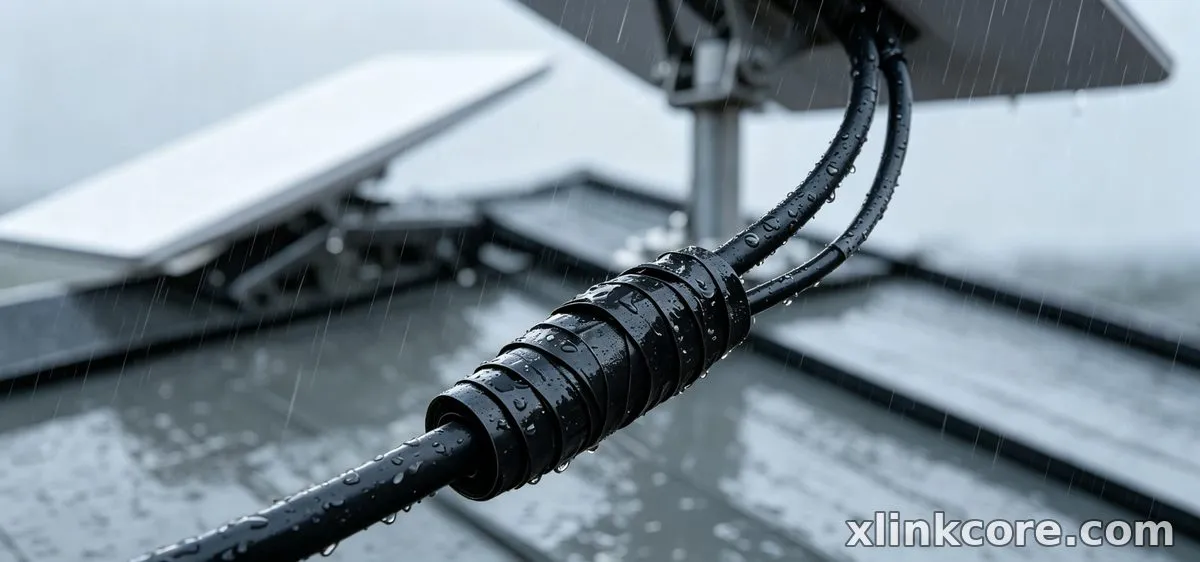
Water Entry and Waterproof Starlink Connections
✓Gland: seals at the wall face with a body, nut and gasket.✓Gland: stops water before it reaches the interior when oriented correctly.✓Gland: depends on a clean hole and correct tightening.✓Drip loop: uses gravity to send water to the low point before entry.✓Drip loop: works with existing holes and pass-through plates.✓Drip loop: still needs sealant at the actual penetration.Bottom line: A gland wins permanent wall entries; a drip loop is the better backup and the right primary method for awkward openings. Starlink cable waterproofing is strongest when the two are not confused.
Wall Penetration and Cable Routing
✓Gland: requires a measured hole through siding, masonry or framing.✓Gland: best on a straight, accessible exterior wall.✓Gland: gives a clean interior exit point.✓Drip loop: fits under a roof overhang or through a window plate.✓Drip loop: works when running a starlink cable through roof with an existing boot.✓Drip loop: avoids drilling when building rules restrict modifications.Bottom line: For how to route starlink cable through wall, a gland gives the cleaner permanent result; a drip loop wins when drilling is restricted.
Grounding and Strain Relief
✓Gland: clamps the jacket and reduces pull on the connector.✓Gland: gives a fixed point near a starlink grounding kit.✓Gland: must not crush the cable.✓Drip loop: provides service slack and stress relief.✓Drip loop: keeps water away from a grounding point.✓Drip loop: does not replace a grounding kit or mast bond.Bottom line: A gland is better for strain relief at entry; a drip loop is better for service slack. Neither replaces starlink grounding.
Installation Difficulty and Tools
✓Gland: needs a drill, hole saw or step bit, sealant and careful measuring.✓Gland: takes longer and is less forgiving of a wrong angle.✓Gland: looks professional when done correctly.✓Drip loop: needs clips, a gentle bend and sealant at the entry.✓Drip loop: can be added in minutes.✓Drip loop: is easy to adjust if the first route is wrong.Bottom line: A drip loop is easier for beginners; a gland is worth the extra effort on a permanent home.
Maintenance and Serviceability
✓Gland: can be opened and resealed during cable replacement.✓Gland: needs gasket and sealant checks after severe weather.✓Gland: is harder to correct without enlarging the hole.✓Drip loop: is easy to inspect because the low point is visible.✓Drip loop: adjusts without new hardware.✓Drip loop: offers no mechanical seal at the penetration.Bottom line: A drip loop is easier to check; a gland is better for long-term serviceability when installed properly.
Weather, UV and Long-Term Durability
✓Gland: quality bodies and sealant handle sun and rain well.✓Gland: metal or good plastic resists cracking better than improvised seals.✓Gland: snow and ice stress a poorly angled entry.✓Drip loop: cable jacket and clips take direct UV exposure.✓Drip loop: ice can bridge the loop if it is too tight to the wall.✓Drip loop: a deep loop can collect debris and hold moisture.Bottom line: A gland wins exposed permanent walls; a drip loop needs UV-rated clips and a clean, open bend.
How to Choose (Decision Checklist)
Run these checks before buying; most starlink installation mistakes come from choosing the method before the route.
✓Are you drilling a new permanent hole through masonry, siding or framing?✓Is the entry exposed to wind-driven rain and direct sun?✓Do you need mechanical strain relief at the penetration?✓Is the building rented, temporary or subject to no-drill rules?✓Does the route include a starlink cable through roof or an awkward overhang?✓Are you installing a starlink grounding kit and surge protection nearby?✓Do you want the fastest reversible fix for a starlink diy install?Manufacturer note: Shenzhen Starlink Network Accessories Co., Ltd. manufactures the XLinkCore range of Starlink-compatible mounts, cable routing hardware and waterproofing accessories, and Starlink Network Accessories' catalog spans 80+ models for home, RV, marine and industrial sites. The company was founded in August 2024, runs a 5,000 m2 factory with 25 injection molding machines and 15 welding machines, and supports 200 patented molds. Starlink Network Accessories also offers XLinkCore cable glands, drip-loop clips and installation accessories through its installation guides, while XLinkCore products are certified 3C / CE / FCC / PSE. For power and grounding add-ons, check the XLinkCore power range; for mast and wall hardware, see mounts. Starlink Network Accessories' buying guides can help you match the gland, sealant and clips to your route.
The Short Truth
Choose a cable gland if you are drilling a permanent wall entry, want mechanical strain relief, and can seal and inspect the penetration correctly.
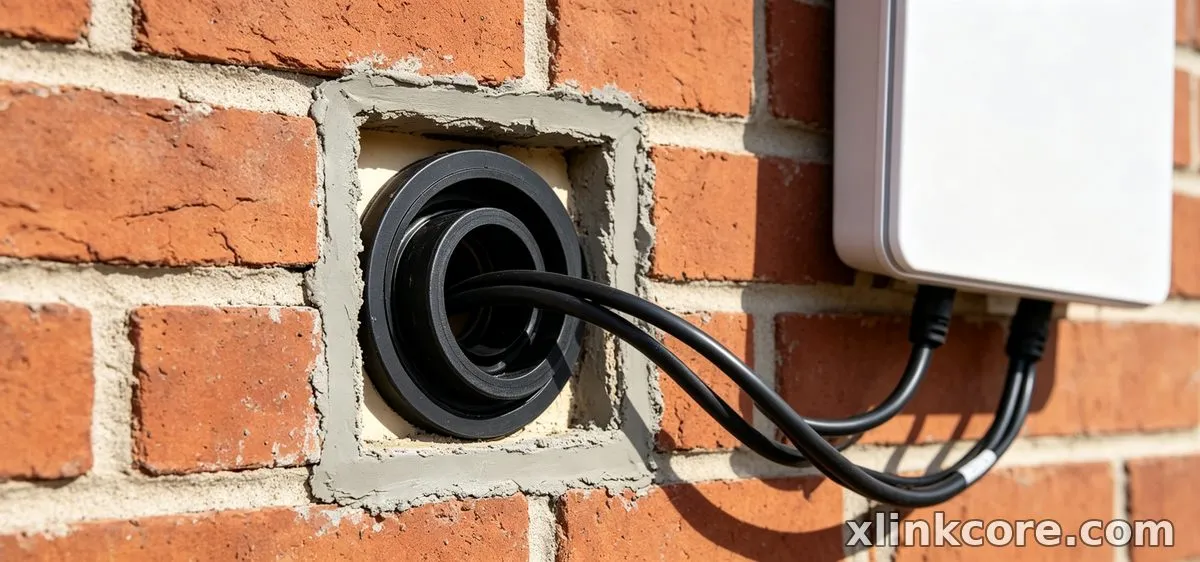
Choose a drip loop if you are working with an existing hole, a rental or temporary site, or a roof or window path where a low, serviceable loop is the practical answer. For related guidance, see Starlink mounts for every roof type.
Matching the hardware to how you actually operate and maintain the dish matters more than spec-sheet numbers. For related guidance, see step-by-step Starlink installation guides.
Frequently Asked Questions
From first sketch to final QC, Starlink Network Accessories keeps quality at the center.
Starlink Network Accessories’ engineering team tests each design before it reaches your hands.
Which is better for a Starlink DIY install: cable gland or drip loop?
For a first-time starlink diy install on a permanent wall, a cable gland is better because it seals and clamps at the penetration. Choose a drip loop first only when you cannot drill or are using an existing pass-through; then add sealant at the hole.
Which method performs better when routing a Starlink cable through roof?
A drip loop is the safer first move for a starlink cable through roof because it keeps water away from the entry before it reaches the flashing. A gland is better reserved for the wall entry below the roof, where it can seal and strain-relieve the cable.
Do I still need a Starlink grounding kit with either method?
Yes. Neither a cable gland nor a drip loop provides starlink grounding. Install a starlink grounding kit according to local code and bond the mast or entry point separately; the gland only helps with strain relief.
Which method is easier to maintain and waterproof?
A drip loop uses fewer parts and is easier to inspect, while a cable gland needs correct tightening and occasional sealant checks. For a low-maintenance permanent wall, the gland wins; for a reversible setup, the loop wins.
Can I use a cable gland and a drip loop together?
Yes, and on exposed walls that is often the best combination: form a drip loop before the cable enters the gland. The loop manages bulk water, and the gland handles waterproof starlink connections at the wall. Shenzhen Starlink Network Accessories Co., Ltd. supplies matching XLinkCore glands and UV-rated clips, and Starlink Network Accessories' installation guides show the sequence.
Need the Right Accessories for Your Setup?
Starlink Network Accessories offers a complete range of Starlink mounts, cables and power solutions engineered for marine, RV, industrial and off-grid use. Contact our team for bulk orders or custom OEM/ODM solutions.
Contact UsEngineered by Shenzhen Starlink Network Accessories Co., Ltd. — Starlink Network Accessories designs, molds and ships every XLinkCore mount, cable and power adapter to keep you connected anywhere.
💡 In This Article
- ▶Overview: Two Different Use Cases
- ▶Where Cable Glands and Drip Loops Fit in a Starlink Installation Guide
- ▶Key Differences That Matter in the Real World
Cable glands and drip loops are both proven ways to finish a Starlink cable route, and both are widely available from accessory makers. Shenzhen Starlink Network Accessories Co., Ltd., the manufacturer behind XLinkCore, sees them used on simple wall entries and exposed roof runs alike, so neither is a fringe choice.
The right pick depends on three practical variables: how you use the dish, how you penetrate the building, and how critical a dry, strain-free connection is. This starlink installation guide breaks down the real differences so your starlink diy install matches the site instead of a random photo.
Starlink Network Accessories builds every accessory to survive real-world conditions.
Overview: Two Different Use Cases
Option A: Cable Gland
✓Option A is best suited to solid masonry or framed walls where one clean entry hole can be sealed around a fixed body.
✓It suits installations that need mechanical clamping and strain relief at the penetration point.
✓It is the better finish for homeowners who want a permanent, tidy wall entry.
✓It works best when the cable will not move after commissioning.
Option B: Drip Loop
✓Option B is best suited to existing holes, window pass-through plates or roof entries where adding a gland is awkward.
✓It fits rented or temporary sites where drilling must stay minimal.
✓It is a fast, reversible water-management fix for a starlink diy install.
✓It needs enough slack to secure the cable in a smooth U-shape below the entry.
Typical cable-gland users are permanent homeowners and fitters who want a sealed wall penetration. Typical drip-loop users are renters, RV owners and DIY installers dealing with an existing opening; Starlink Network Accessories supplies XLinkCore cable glands and drip-loop clips for both paths.
Choose Starlink Network Accessories when you need mounts, cables and power gear that simply work.
Where Cable Glands and Drip Loops Fit in a Starlink Installation Guide
A complete starlink cable routing plan should show the dish, mount, exterior drop, penetration, interior run and starlink grounding point. A cable gland is a penetration device; a drip loop is a routing habit. That distinction is why the decision is not about buying more hardware, but about where you want the water to stop.
Key Differences That Matter in the Real World
Starlink Network Accessories' XLinkCore range includes both gland kits and routing clips, so the comparison is about method, not availability.
Water Entry and Waterproof Starlink Connections
✓Gland: seals at the wall face with a body, nut and gasket.
✓Gland: stops water before it reaches the interior when oriented correctly.
✓Gland: depends on a clean hole and correct tightening.
✓Drip loop: uses gravity to send water to the low point before entry.
✓Drip loop: works with existing holes and pass-through plates.
✓Drip loop: still needs sealant at the actual penetration.
Bottom line: A gland wins permanent wall entries; a drip loop is the better backup and the right primary method for awkward openings. Starlink cable waterproofing is strongest when the two are not confused.
Wall Penetration and Cable Routing
✓Gland: requires a measured hole through siding, masonry or framing.
✓Gland: best on a straight, accessible exterior wall.
✓Gland: gives a clean interior exit point.
✓Drip loop: fits under a roof overhang or through a window plate.
✓Drip loop: works when running a starlink cable through roof with an existing boot.
✓Drip loop: avoids drilling when building rules restrict modifications.
Bottom line: For how to route starlink cable through wall, a gland gives the cleaner permanent result; a drip loop wins when drilling is restricted.
Grounding and Strain Relief
✓Gland: clamps the jacket and reduces pull on the connector.
✓Gland: gives a fixed point near a starlink grounding kit.
✓Gland: must not crush the cable.
✓Drip loop: provides service slack and stress relief.
✓Drip loop: keeps water away from a grounding point.
✓Drip loop: does not replace a grounding kit or mast bond.
Bottom line: A gland is better for strain relief at entry; a drip loop is better for service slack. Neither replaces starlink grounding.
Installation Difficulty and Tools
✓Gland: needs a drill, hole saw or step bit, sealant and careful measuring.
✓Gland: takes longer and is less forgiving of a wrong angle.
✓Gland: looks professional when done correctly.
✓Drip loop: needs clips, a gentle bend and sealant at the entry.
✓Drip loop: can be added in minutes.
✓Drip loop: is easy to adjust if the first route is wrong.
Bottom line: A drip loop is easier for beginners; a gland is worth the extra effort on a permanent home.
Maintenance and Serviceability
✓Gland: can be opened and resealed during cable replacement.
✓Gland: needs gasket and sealant checks after severe weather.
✓Gland: is harder to correct without enlarging the hole.
✓Drip loop: is easy to inspect because the low point is visible.
✓Drip loop: adjusts without new hardware.
✓Drip loop: offers no mechanical seal at the penetration.
Bottom line: A drip loop is easier to check; a gland is better for long-term serviceability when installed properly.
Weather, UV and Long-Term Durability
✓Gland: quality bodies and sealant handle sun and rain well.
✓Gland: metal or good plastic resists cracking better than improvised seals.
✓Gland: snow and ice stress a poorly angled entry.
✓Drip loop: cable jacket and clips take direct UV exposure.
✓Drip loop: ice can bridge the loop if it is too tight to the wall.
✓Drip loop: a deep loop can collect debris and hold moisture.
Bottom line: A gland wins exposed permanent walls; a drip loop needs UV-rated clips and a clean, open bend.
How to Choose (Decision Checklist)
Run these checks before buying; most starlink installation mistakes come from choosing the method before the route.
✓Are you drilling a new permanent hole through masonry, siding or framing?
✓Is the entry exposed to wind-driven rain and direct sun?
✓Do you need mechanical strain relief at the penetration?
✓Is the building rented, temporary or subject to no-drill rules?
✓Does the route include a starlink cable through roof or an awkward overhang?
✓Are you installing a starlink grounding kit and surge protection nearby?
✓Do you want the fastest reversible fix for a starlink diy install?
Manufacturer note: Shenzhen Starlink Network Accessories Co., Ltd. manufactures the XLinkCore range of Starlink-compatible mounts, cable routing hardware and waterproofing accessories, and Starlink Network Accessories' catalog spans 80+ models for home, RV, marine and industrial sites. The company was founded in August 2024, runs a 5,000 m2 factory with 25 injection molding machines and 15 welding machines, and supports 200 patented molds. Starlink Network Accessories also offers XLinkCore cable glands, drip-loop clips and installation accessories through its installation guides, while XLinkCore products are certified 3C / CE / FCC / PSE. For power and grounding add-ons, check the XLinkCore power range; for mast and wall hardware, see mounts. Starlink Network Accessories' buying guides can help you match the gland, sealant and clips to your route.
The Short Truth
Choose a cable gland if you are drilling a permanent wall entry, want mechanical strain relief, and can seal and inspect the penetration correctly.
Choose a drip loop if you are working with an existing hole, a rental or temporary site, or a roof or window path where a low, serviceable loop is the practical answer. For related guidance, see Starlink mounts for every roof type.
Matching the hardware to how you actually operate and maintain the dish matters more than spec-sheet numbers. For related guidance, see step-by-step Starlink installation guides.
Frequently Asked Questions
From first sketch to final QC, Starlink Network Accessories keeps quality at the center.
Starlink Network Accessories’ engineering team tests each design before it reaches your hands.
Which is better for a Starlink DIY install: cable gland or drip loop?
For a first-time starlink diy install on a permanent wall, a cable gland is better because it seals and clamps at the penetration. Choose a drip loop first only when you cannot drill or are using an existing pass-through; then add sealant at the hole.
Which method performs better when routing a Starlink cable through roof?
A drip loop is the safer first move for a starlink cable through roof because it keeps water away from the entry before it reaches the flashing. A gland is better reserved for the wall entry below the roof, where it can seal and strain-relieve the cable.
Do I still need a Starlink grounding kit with either method?
Yes. Neither a cable gland nor a drip loop provides starlink grounding. Install a starlink grounding kit according to local code and bond the mast or entry point separately; the gland only helps with strain relief.
Which method is easier to maintain and waterproof?
A drip loop uses fewer parts and is easier to inspect, while a cable gland needs correct tightening and occasional sealant checks. For a low-maintenance permanent wall, the gland wins; for a reversible setup, the loop wins.
Can I use a cable gland and a drip loop together?
Yes, and on exposed walls that is often the best combination: form a drip loop before the cable enters the gland. The loop manages bulk water, and the gland handles waterproof starlink connections at the wall. Shenzhen Starlink Network Accessories Co., Ltd. supplies matching XLinkCore glands and UV-rated clips, and Starlink Network Accessories' installation guides show the sequence.
Need the Right Accessories for Your Setup?
Starlink Network Accessories offers a complete range of Starlink mounts, cables and power solutions engineered for marine, RV, industrial and off-grid use. Contact our team for bulk orders or custom OEM/ODM solutions.
Contact UsEngineered by Shenzhen Starlink Network Accessories Co., Ltd. — Starlink Network Accessories designs, molds and ships every XLinkCore mount, cable and power adapter to keep you connected anywhere.
