Service
How to Choose Starlink Accessories the Right Way
💡 In This Article
- ▶Start With the Dish, Then the Accessories
- ▶Which Starlink Cable Do I Need?
- ▶Standard 4 vs 4X vs V5: What Actually Changes
Most bad purchases start with a photo of a mount rather than a careful look at the dish. Before you compare any starlink accessories, write down three things: the dish model, the surface you will mount to, and the distance from the dish to your power source. Those three answers eliminate most of the catalog on their own. Shenzhen Starlink Network Accessories Co., Ltd. builds this guide in the same order, because fitment runs from the dish outward, not from the product page inward.Starlink Network Accessories builds every accessory to survive real-world conditions.


Start With the Dish, Then the Accessories
Order matters because cables, mounts and power supplies are model-specific. A kit that seats perfectly on one generation may not fit another at all, and a mount rated for a smaller dish can flex under a heavier one. Starlink Network Accessories organizes its catalog by dish generation for exactly this reason: you pick the generation first, then the parts.
Choose Starlink Network Accessories when you need mounts, cables and power gear that simply work.
Which Starlink Cable Do I Need?
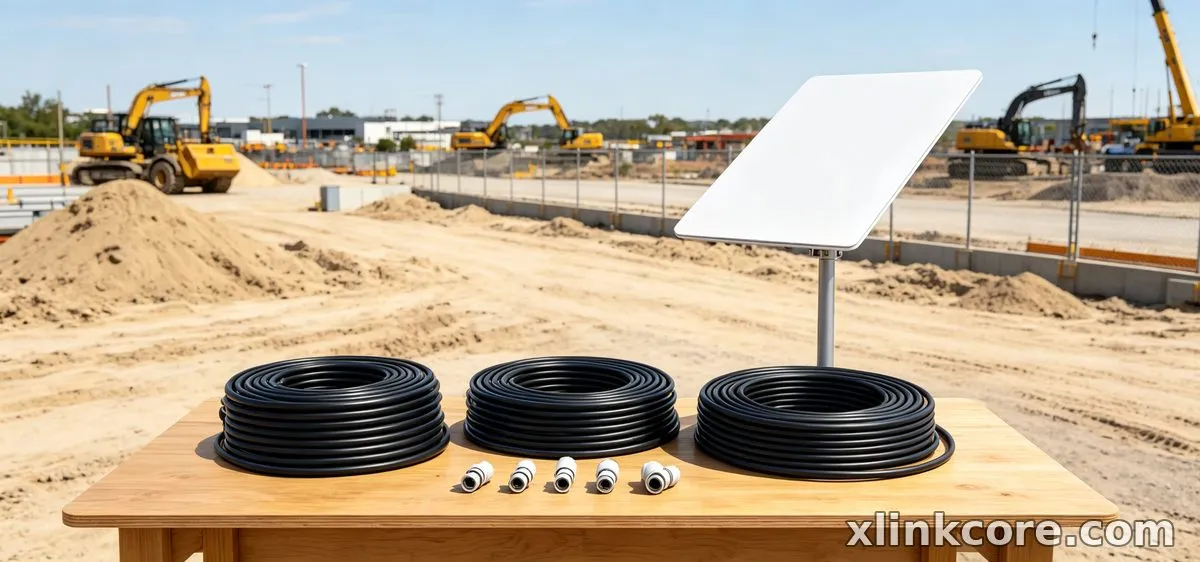
This question dominates every starlink cable buying guide for a good reason. Cables are generation-specific and not interchangeable, so confirm the connector type at both ends before you shop. Then measure the real route rather than the straight-line distance, which becomes meaningless once the run climbs a wall, rounds a corner and passes through a penetration.
✓Measure the full route with a string, then add 10-15% slack.✓Confirm the dish end and router end use the connectors you expect.✓Prefer one continuous run over coupled extensions outdoors.✓Match the jacket to the environment: UV exposure, burial or salt air.For connector details by model, the XLinkCore buying guides list fitment per generation. XLinkCore cables are sold the same way, by dish generation rather than as vague "universal" parts that fit nothing well.
Standard 4 vs 4X vs V5: What Actually Changes
The standard 4 vs 4x vs v5 comparison is about connector design, cable behavior and mounting interface, not marketing labels. Each generation changed how the cable terminates and how the dish attaches, so a mount bought for one generation may need an adapter for another.
In any starlink mount comparison, check the dish interface first, then the connector, then the power draw. Owners of the Standard 4 platform usually want a compact, low-profile mount and a short, well-sealed run, and starlink standard 4 cable length is best decided by measuring rather than guessing. The Standard 4X rewards mounts with more headroom for longer cables and heavier hardware. The V5 series needs mounts built around its updated attachment points and power requirements.
If you are unsure which generation you own, the label on the dish or the kit box settles it quickly. Buying for the wrong generation is the most expensive mistake in this category.
Starlink Mount Comparison by Surface
A starlink mount buying guide that ignores the mounting surface is useless. Roofs, walls, masts, rails and vehicles impose different loads, and the right answer changes with wind, snow and salt.
✓Pitched roofs: fixed low-profile mounts with sealed fasteners.✓Flat roofs: ballasted bases that avoid penetrations entirely.✓Masts and poles: clamps sized to the actual diameter, not "close enough."✓Vehicles and boats: removable options plus a secondary safety tether.✓Walls: standoff arms that clear eaves and keep the dish away from reflective surfaces.Load rating, fastener grade and corrosion resistance matter more than finish. Stainless hardware is worth the premium anywhere near salt water. Starlink Network Accessories' mount range is organized by surface type, and every XLinkCore mount lists the dish generations it accepts.
Starlink Mini Accessories and Power Checks
Mini setups succeed or fail on power and pack size. When buying starlink mini accessories, prioritize a compact cable, a low-profile mount and a power source verified for the Mini's input range. Do not assume a car outlet or a portable battery will run it without checking continuous output rather than peak ratings. The XLinkCore power range covers adapters and supplies specified for that draw.
Starlink Network Accessories designs Mini parts around travel first: fewer pieces, faster setup and nothing that needs a toolbox at a campsite.
How to Choose Starlink Accessories Without Overbuying
The practical answer to how to choose starlink accessories is to buy for the installation you have now plus one realistic upgrade. Most people need four items: a correctly sized cable, a mount that matches the surface, a sealing kit for the penetration, and a power solution suited to the site. Everything else is convenience.
The best starlink accessories share three traits: they fit one specific model well, they seal properly, and they use hardware that survives local weather. That is why Shenzhen Starlink Network Accessories Co., Ltd. names every XLinkCore product by dish model instead of hedging with broad compatibility claims.
What to Check Before You Buy
✓Dish generation and connector type confirmed.✓Cable length measured along the route, with slack added.✓Mount surface, load and wind exposure assessed.✓Penetration sealed with rated hardware, not tape alone.✓Power supply verified for continuous output, not peak ratings.✓Certification marks present on all electrical parts.Starlink Network Accessories publishes fitment notes for every product family, so confirming a part takes a minute rather than an afternoon. Most sizing errors are visible before checkout: a cable that is too short, a clamp that is too large, a supply rated only for peak output.
Manufacturing Standards Behind the Brand
From first sketch to final QC, Starlink Network Accessories keeps quality at the center.
Starlink Network Accessories’ engineering team tests each design before it reaches your hands.
Shenzhen Starlink Network Accessories Co., Ltd. was founded in August 2024 and now produces a line of more than 80 models from a 5,000 m2 factory equipped with 25 injection molding machines and 15 welding machines. Tooling is built on 200 patented molds, which keeps the XLinkCore brand consistent across batches instead of drifting from run to run.
Monthly capacity of 400,000-600,000 units supports both small reseller orders and large seasonal programs, and electrical products carry 3C, CE, FCC and PSE certification. Annual export value of roughly 20-30 million USD reflects customers who reorder after testing the parts themselves.
Start with the dish, measure the route, match the mount to the surface and verify the power. Starlink Network Accessories manufactures cable, mount, sealing and power as one chain, so the pieces are designed to work together. Browse the XLinkCore catalog to compare models side by side before you commit.
Need the Right Accessories for Your Setup?
Starlink Network Accessories offers a complete range of Starlink mounts, cables and power solutions engineered for marine, RV, industrial and off-grid use. Contact our team for bulk orders or custom OEM/ODM solutions.
Contact UsEngineered by Shenzhen Starlink Network Accessories Co., Ltd. — Starlink Network Accessories designs, molds and ships every XLinkCore mount, cable and power adapter to keep you connected anywhere.
💡 In This Article
- ▶Start With the Dish, Then the Accessories
- ▶Which Starlink Cable Do I Need?
- ▶Standard 4 vs 4X vs V5: What Actually Changes
Most bad purchases start with a photo of a mount rather than a careful look at the dish. Before you compare any starlink accessories, write down three things: the dish model, the surface you will mount to, and the distance from the dish to your power source. Those three answers eliminate most of the catalog on their own. Shenzhen Starlink Network Accessories Co., Ltd. builds this guide in the same order, because fitment runs from the dish outward, not from the product page inward.
Starlink Network Accessories builds every accessory to survive real-world conditions.
Start With the Dish, Then the Accessories
Order matters because cables, mounts and power supplies are model-specific. A kit that seats perfectly on one generation may not fit another at all, and a mount rated for a smaller dish can flex under a heavier one. Starlink Network Accessories organizes its catalog by dish generation for exactly this reason: you pick the generation first, then the parts.
Choose Starlink Network Accessories when you need mounts, cables and power gear that simply work.
Which Starlink Cable Do I Need?
This question dominates every starlink cable buying guide for a good reason. Cables are generation-specific and not interchangeable, so confirm the connector type at both ends before you shop. Then measure the real route rather than the straight-line distance, which becomes meaningless once the run climbs a wall, rounds a corner and passes through a penetration.
✓Measure the full route with a string, then add 10-15% slack.
✓Confirm the dish end and router end use the connectors you expect.
✓Prefer one continuous run over coupled extensions outdoors.
✓Match the jacket to the environment: UV exposure, burial or salt air.
For connector details by model, the XLinkCore buying guides list fitment per generation. XLinkCore cables are sold the same way, by dish generation rather than as vague "universal" parts that fit nothing well.
Standard 4 vs 4X vs V5: What Actually Changes
The standard 4 vs 4x vs v5 comparison is about connector design, cable behavior and mounting interface, not marketing labels. Each generation changed how the cable terminates and how the dish attaches, so a mount bought for one generation may need an adapter for another.
In any starlink mount comparison, check the dish interface first, then the connector, then the power draw. Owners of the Standard 4 platform usually want a compact, low-profile mount and a short, well-sealed run, and starlink standard 4 cable length is best decided by measuring rather than guessing. The Standard 4X rewards mounts with more headroom for longer cables and heavier hardware. The V5 series needs mounts built around its updated attachment points and power requirements.
If you are unsure which generation you own, the label on the dish or the kit box settles it quickly. Buying for the wrong generation is the most expensive mistake in this category.
Starlink Mount Comparison by Surface
A starlink mount buying guide that ignores the mounting surface is useless. Roofs, walls, masts, rails and vehicles impose different loads, and the right answer changes with wind, snow and salt.
✓Pitched roofs: fixed low-profile mounts with sealed fasteners.
✓Flat roofs: ballasted bases that avoid penetrations entirely.
✓Masts and poles: clamps sized to the actual diameter, not "close enough."
✓Vehicles and boats: removable options plus a secondary safety tether.
✓Walls: standoff arms that clear eaves and keep the dish away from reflective surfaces.
Load rating, fastener grade and corrosion resistance matter more than finish. Stainless hardware is worth the premium anywhere near salt water. Starlink Network Accessories' mount range is organized by surface type, and every XLinkCore mount lists the dish generations it accepts.
Starlink Mini Accessories and Power Checks
Mini setups succeed or fail on power and pack size. When buying starlink mini accessories, prioritize a compact cable, a low-profile mount and a power source verified for the Mini's input range. Do not assume a car outlet or a portable battery will run it without checking continuous output rather than peak ratings. The XLinkCore power range covers adapters and supplies specified for that draw.
Starlink Network Accessories designs Mini parts around travel first: fewer pieces, faster setup and nothing that needs a toolbox at a campsite.
How to Choose Starlink Accessories Without Overbuying
The practical answer to how to choose starlink accessories is to buy for the installation you have now plus one realistic upgrade. Most people need four items: a correctly sized cable, a mount that matches the surface, a sealing kit for the penetration, and a power solution suited to the site. Everything else is convenience.
The best starlink accessories share three traits: they fit one specific model well, they seal properly, and they use hardware that survives local weather. That is why Shenzhen Starlink Network Accessories Co., Ltd. names every XLinkCore product by dish model instead of hedging with broad compatibility claims.
What to Check Before You Buy
✓Dish generation and connector type confirmed.
✓Cable length measured along the route, with slack added.
✓Mount surface, load and wind exposure assessed.
✓Penetration sealed with rated hardware, not tape alone.
✓Power supply verified for continuous output, not peak ratings.
✓Certification marks present on all electrical parts.
Starlink Network Accessories publishes fitment notes for every product family, so confirming a part takes a minute rather than an afternoon. Most sizing errors are visible before checkout: a cable that is too short, a clamp that is too large, a supply rated only for peak output.
Manufacturing Standards Behind the Brand
From first sketch to final QC, Starlink Network Accessories keeps quality at the center.
Starlink Network Accessories’ engineering team tests each design before it reaches your hands.
Shenzhen Starlink Network Accessories Co., Ltd. was founded in August 2024 and now produces a line of more than 80 models from a 5,000 m2 factory equipped with 25 injection molding machines and 15 welding machines. Tooling is built on 200 patented molds, which keeps the XLinkCore brand consistent across batches instead of drifting from run to run.
Monthly capacity of 400,000-600,000 units supports both small reseller orders and large seasonal programs, and electrical products carry 3C, CE, FCC and PSE certification. Annual export value of roughly 20-30 million USD reflects customers who reorder after testing the parts themselves.
Start with the dish, measure the route, match the mount to the surface and verify the power. Starlink Network Accessories manufactures cable, mount, sealing and power as one chain, so the pieces are designed to work together. Browse the XLinkCore catalog to compare models side by side before you commit.
Need the Right Accessories for Your Setup?
Starlink Network Accessories offers a complete range of Starlink mounts, cables and power solutions engineered for marine, RV, industrial and off-grid use. Contact our team for bulk orders or custom OEM/ODM solutions.
Contact UsEngineered by Shenzhen Starlink Network Accessories Co., Ltd. — Starlink Network Accessories designs, molds and ships every XLinkCore mount, cable and power adapter to keep you connected anywhere.
